Build MCP servers with external OAuth
When building production MCP servers, you often need to protect sensitive endpoints with OAuth authentication. This guide shows you how to build an MCP server with external OAuth authentication. We’ll use FusionAuth as an example, but you can use any OAuth 2.0 provider you have set up (such as Auth0, Okta, Keycloak, or your own OAuth server).
We’ll build an enhanced version of the Push Advisor API from earlier guides, adding OAuth-protected endpoints that demonstrate real-world authentication patterns.
What we’ll build
Section titled “What we’ll build”In this guide, we’ll:
- First, set up an API with both public and OAuth-protected endpoints
- Next, configure an external OAuth provider (we’ll use FusionAuth as an example)
- Then create a manual login flow for token testing
- Finally, integrate with Gram’s OAuth configuration and test protected endpoints in the playground
Setting up the project
Section titled “Setting up the project”First, we’ll start with extending the Push Advisor API with an OAuth-protected endpoint:
// Basic API endpointsconst endpoints = { '/can-i-push-to-prod': 'Public - Check if it\'s safe to deploy', '/vibe-check': 'Public - Random deployment vibe check', '/deploy-history': 'Protected - View deployment history (OAuth required)', '/login': 'Utility - Manual OAuth token generation page'};We’ve added a deploy-history endpoint that requires OAuth authentication. We’ve also added a login endpoint that provides a manual login page for token generation.
Configuring your OAuth provider
Section titled “Configuring your OAuth provider”Before we implement OAuth protection in our API, we need to set up an OAuth provider. In this example, we’ll use FusionAuth, but the same principles apply to any OAuth 2.0 compliant provider like Auth0, Okta, Keycloak, or your own implementation.
Application setup
Section titled “Application setup”First, we’ll set up our OAuth provider to work with our API. These steps are similar across different OAuth providers:
-
Create Application: In your OAuth provider’s admin panel, create a new application/client named “Push Advisor API”
-
OAuth Configuration:
- Enable Authorization Code grant type
- Set redirect URLs:
https://gram-oauth.abdulbaaridavids04.workers.dev/tokenhttps://localhost:8787/token
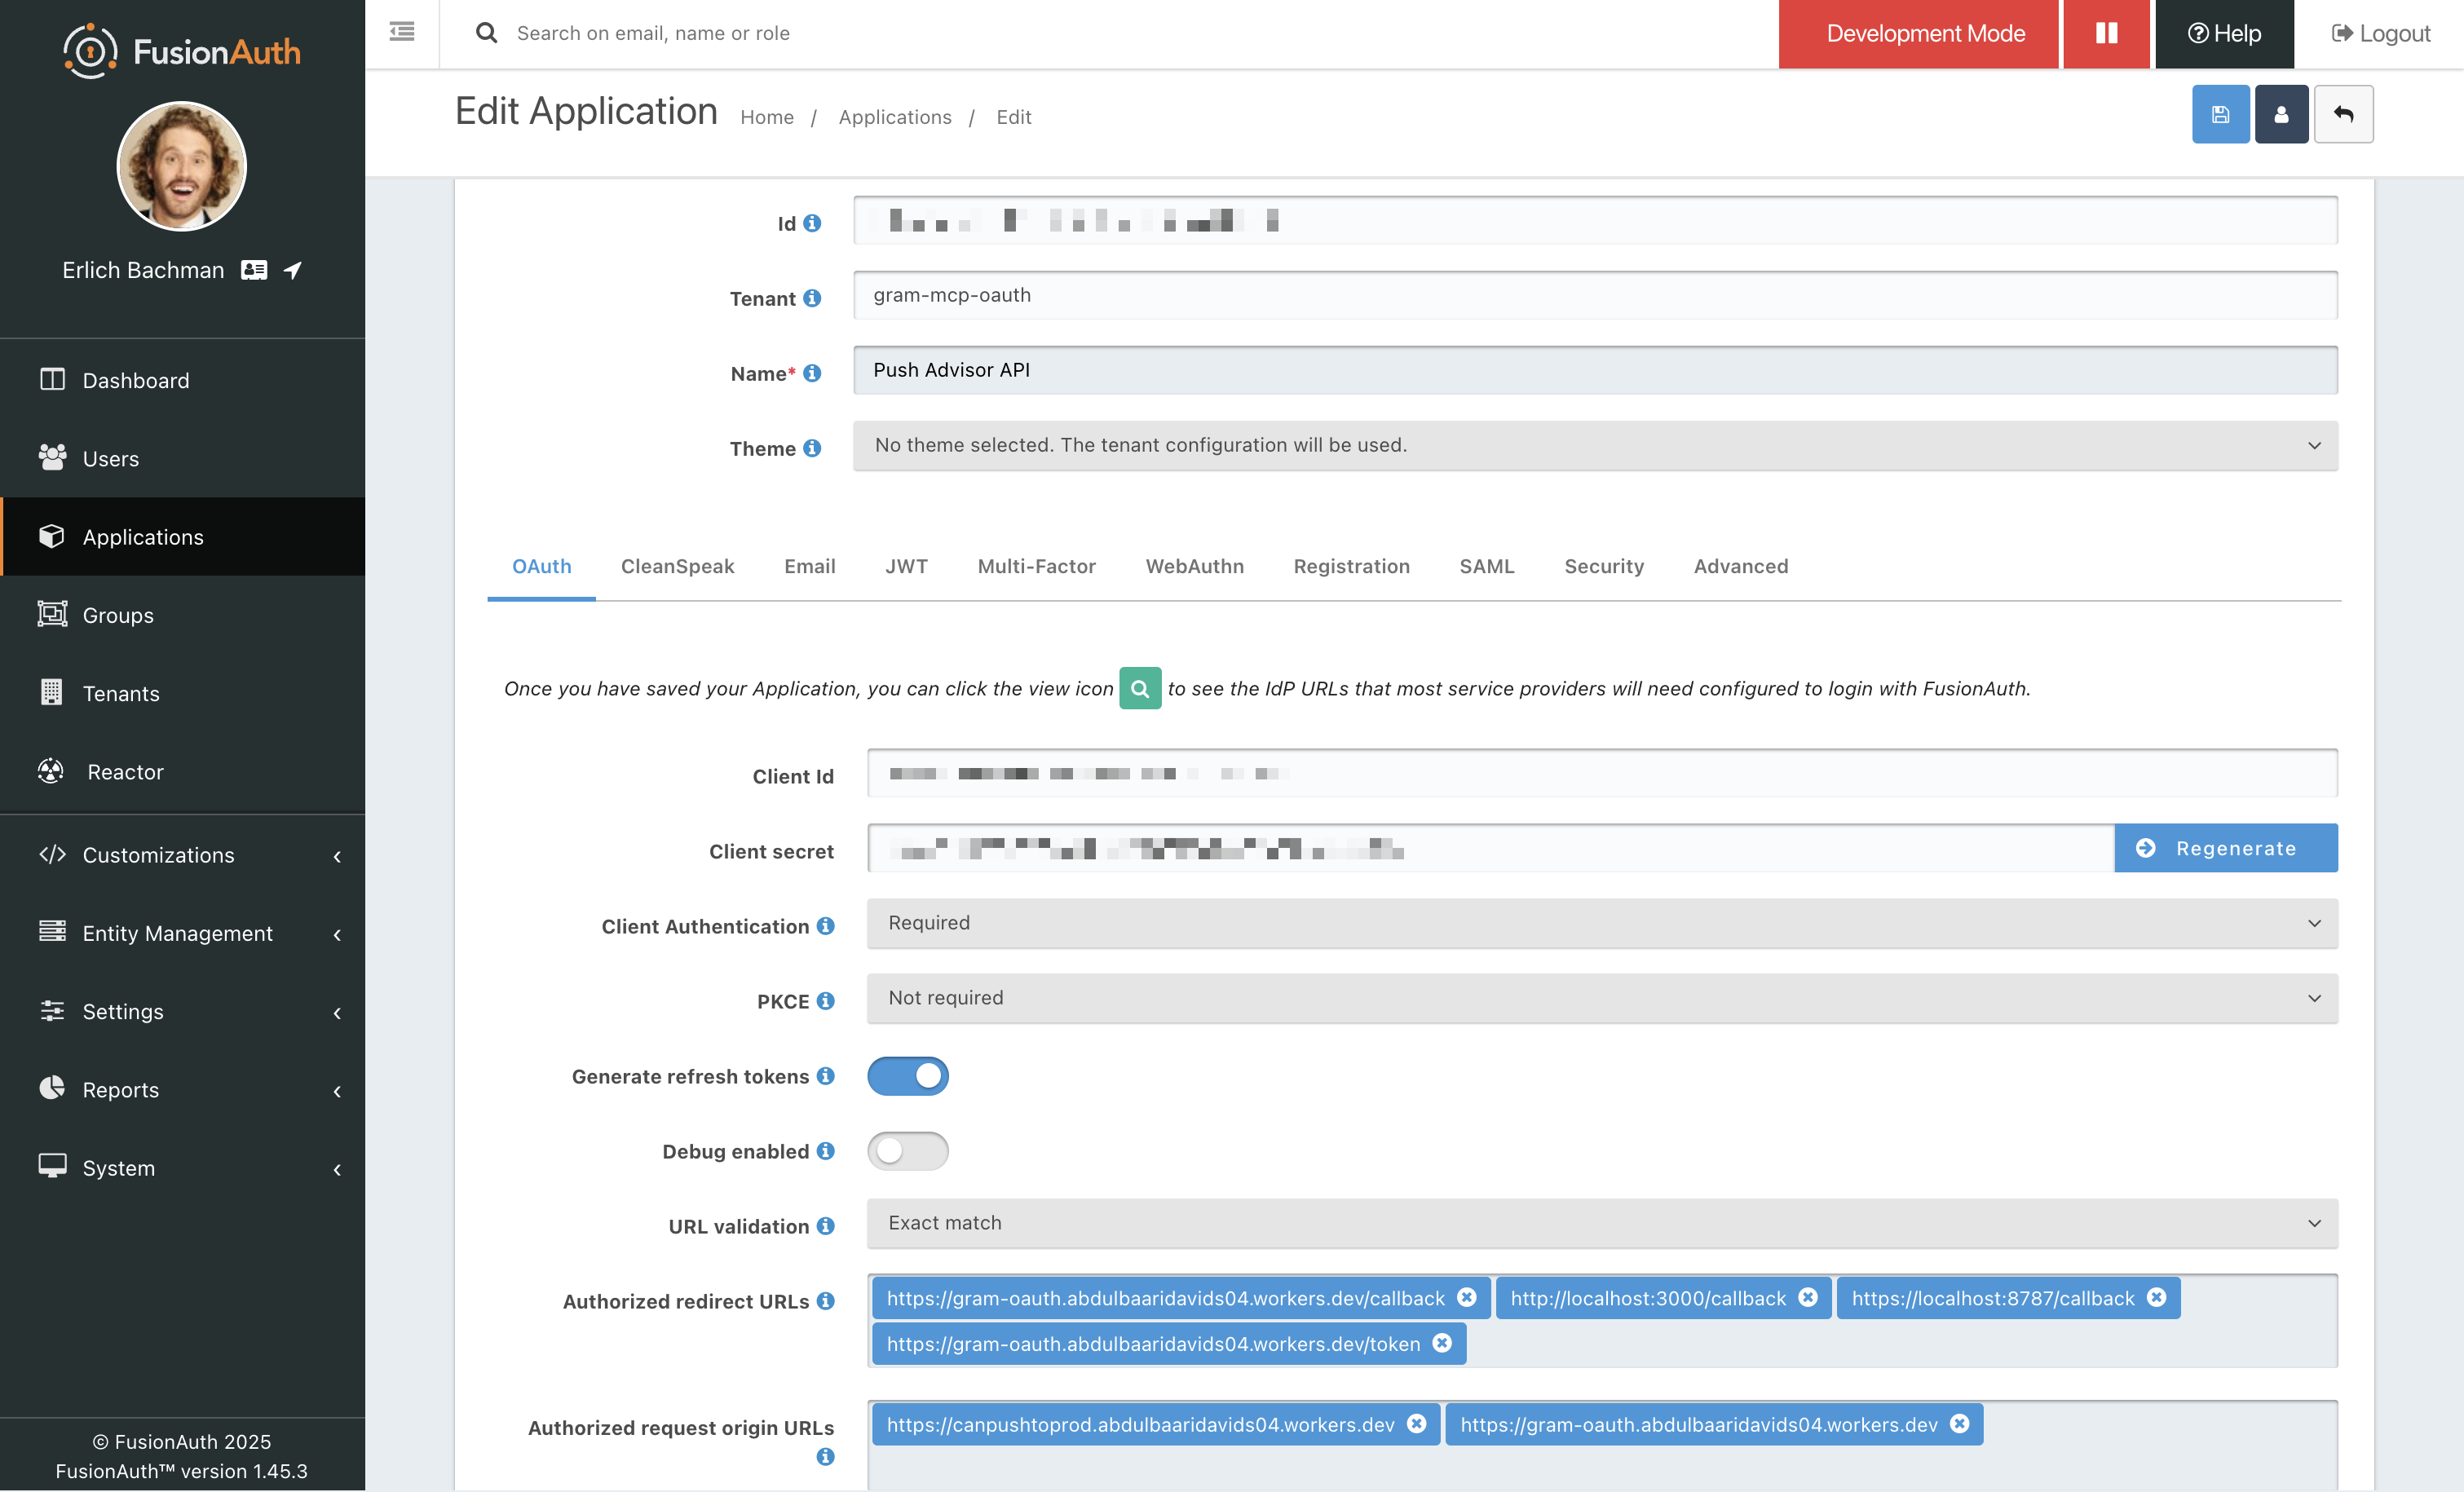
- Get Credentials: Note the Client ID and Client Secret for your configuration
API configuration
Section titled “API configuration”Now we can configure our OAuth provider settings in the API. Replace these values with your actual OAuth provider’s configuration:
const OAUTH_CONFIG = {  url: 'https://fusionauth.ritza.co', // Replace with your OAuth provider's URL  clientId: 'your-application-client-id', // From your OAuth provider  clientSecret: 'your-application-client-secret', // From your OAuth provider  applicationName: 'Push Advisor API'};
// Note: Replace the URL above with your OAuth provider's base URL:// - Auth0: https://your-domain.auth0.com// - Okta: https://your-domain.okta.com// - Keycloak: https://your-keycloak-server.com/realms/your-realm// - Custom server: https://your-oauth-server.com
Next, we’ll implement the OAuth protection within the API. We’ll add middleware that validates OAuth tokens against our external provider.
async function validateOAuthToken(request) {  const authHeader = request.headers.get('Authorization');
  if (!authHeader || !authHeader.startsWith('Bearer ')) {    return { valid: false, error: 'Missing or invalid authorization header' };  }
  const token = authHeader.substring(7);
  if (!token) {    return { valid: false, error: 'No token provided' };  }
  try {    // Check for demo tokens (for testing)    if (token.startsWith('demo_token_')) {      return {        valid: true,        scopes: ['api:read', 'api:write'],        userId: 'demo-user-' + token.split('_')[2]      };    }
    // Validate against OAuth provider's introspection endpoint    const response = await fetch(`${OAUTH_CONFIG.url}/oauth2/introspect`, {      method: 'POST',      headers: {        'Content-Type': 'application/x-www-form-urlencoded',        'Authorization': `Basic ${btoa(`${OAUTH_CONFIG.clientId}:${OAUTH_CONFIG.clientSecret}`)}`      },      body: `token=${token}&client_id=${OAUTH_CONFIG.clientId}`    });
    if (!response.ok) {      return { valid: false, error: 'Token validation failed' };    }
    const tokenInfo = await response.json();
    if (!tokenInfo.active) {      return { valid: false, error: 'Token is not active' };    }
    return {      valid: true,      scopes: tokenInfo.scope ? tokenInfo.scope.split(' ') : [],      userId: tokenInfo.sub    };  } catch (error) {    return { valid: false, error: 'Token validation service unavailable' };  }}
Protected endpoint implementation
Section titled “Protected endpoint implementation”Next, we’ll implement endpoints that require authentication:
async function handleDeployHistory(request, corsHeaders) {  // This endpoint requires authentication  const validation = await validateOAuthToken(request);
  if (!validation.valid) {    return new Response(JSON.stringify({      error: 'Authentication required',      message: 'This endpoint requires a valid OAuth token.',      required_scopes: ['api:read']    }), {      status: 401,      headers: {        'Content-Type': 'application/json',        'WWW-Authenticate': 'Bearer realm="Push Advisor API"',        ...corsHeaders      }    });  }
  // Check scopes  if (!hasRequiredScope(validation.scopes, 'api:read')) {    return new Response(JSON.stringify({      error: 'Insufficient permissions',      message: 'This endpoint requires api:read scope.'    }), {      status: 403,      headers: { 'Content-Type': 'application/json', ...corsHeaders }    });  }
  // Return protected data  const deployments = [    {      id: 'deploy-001',      timestamp: '2024-08-13T15:30:00Z',      environment: 'production',      status: 'success',      user: validation.userId    }  ];
  return new Response(JSON.stringify({    deployments,    authenticated_user: validation.userId,    message: 'This is a protected endpoint - you needed OAuth to see this!'  }), {    status: 200,    headers: { 'Content-Type': 'application/json', ...corsHeaders }  });}
OAuth discovery endpoint
Section titled “OAuth discovery endpoint”We’ll also need to implement the OAuth discovery endpoint required by the MCP specification:
function handleOAuthDiscovery(corsHeaders) {  const discoveryDoc = {    "issuer": OAUTH_CONFIG.url,    "authorization_endpoint": `${OAUTH_CONFIG.url}/oauth2/authorize`,    "token_endpoint": `${OAUTH_CONFIG.url}/oauth2/token`,    "introspection_endpoint": `${OAUTH_CONFIG.url}/oauth2/introspect`,    "userinfo_endpoint": `${OAUTH_CONFIG.url}/oauth2/userinfo`,    "jwks_uri": `${OAUTH_CONFIG.url}/.well-known/jwks.json`,    "response_types_supported": ["code"],    "grant_types_supported": ["authorization_code", "refresh_token"],    "scopes_supported": ["openid", "profile", "email", "api:read", "api:write"],    "code_challenge_methods_supported": ["plain", "S256"]  };
  return new Response(JSON.stringify(discoveryDoc, null, 2), {    status: 200,    headers: { 'Content-Type': 'application/json', ...corsHeaders }  });}
Manual login page
Section titled “Manual login page”For testing purposes, we’ll create a basic login page for token generation:
function handleLogin(request, corsHeaders) {  const loginPageHTML = `<!DOCTYPE html><html lang="en"><head>    <meta charset="UTF-8">    <title>Push Advisor API - Login</title></head><body>    <div class="container">        <h1>🔐 Push Advisor API - Login</h1>
        <!-- OAuth Flow Section -->        <div class="oauth-flow">            <h3>🚀 OAuth Authorization</h3>            <p>Click below to authenticate with FusionAuth:</p>            <a href="${OAUTH_CONFIG.url}/oauth2/authorize?client_id=${OAUTH_CONFIG.clientId}&response_type=code&redirect_uri=https://gram-oauth.abdulbaaridavids04.workers.dev/token&scope=api:read%20api:write"               class="oauth-btn">Login with OAuth Provider</a>        </div>
        <!-- Demo Token Section -->        <div class="demo-form">            <h3>⚠️ Demo Token Generation</h3>            <p>For testing: Generate a demo token</p>            <form id="tokenForm">                <input type="text" placeholder="Username" required>                <input type="password" placeholder="Password" required>                <button type="submit">Generate Demo Token</button>            </form>        </div>
        <div class="instructions">            <h3>📋 How to Use</h3>            <p>Copy your token and use it in API requests:</p>            <code>curl -H "Authorization: Bearer YOUR_TOKEN" https://gram-oauth.abdulbaaridavids04.workers.dev/deploy-history</code>        </div>    </div></body></html>`;
  return new Response(loginPageHTML, {    status: 200,    headers: { 'Content-Type': 'text/html; charset=utf-8', ...corsHeaders }  });}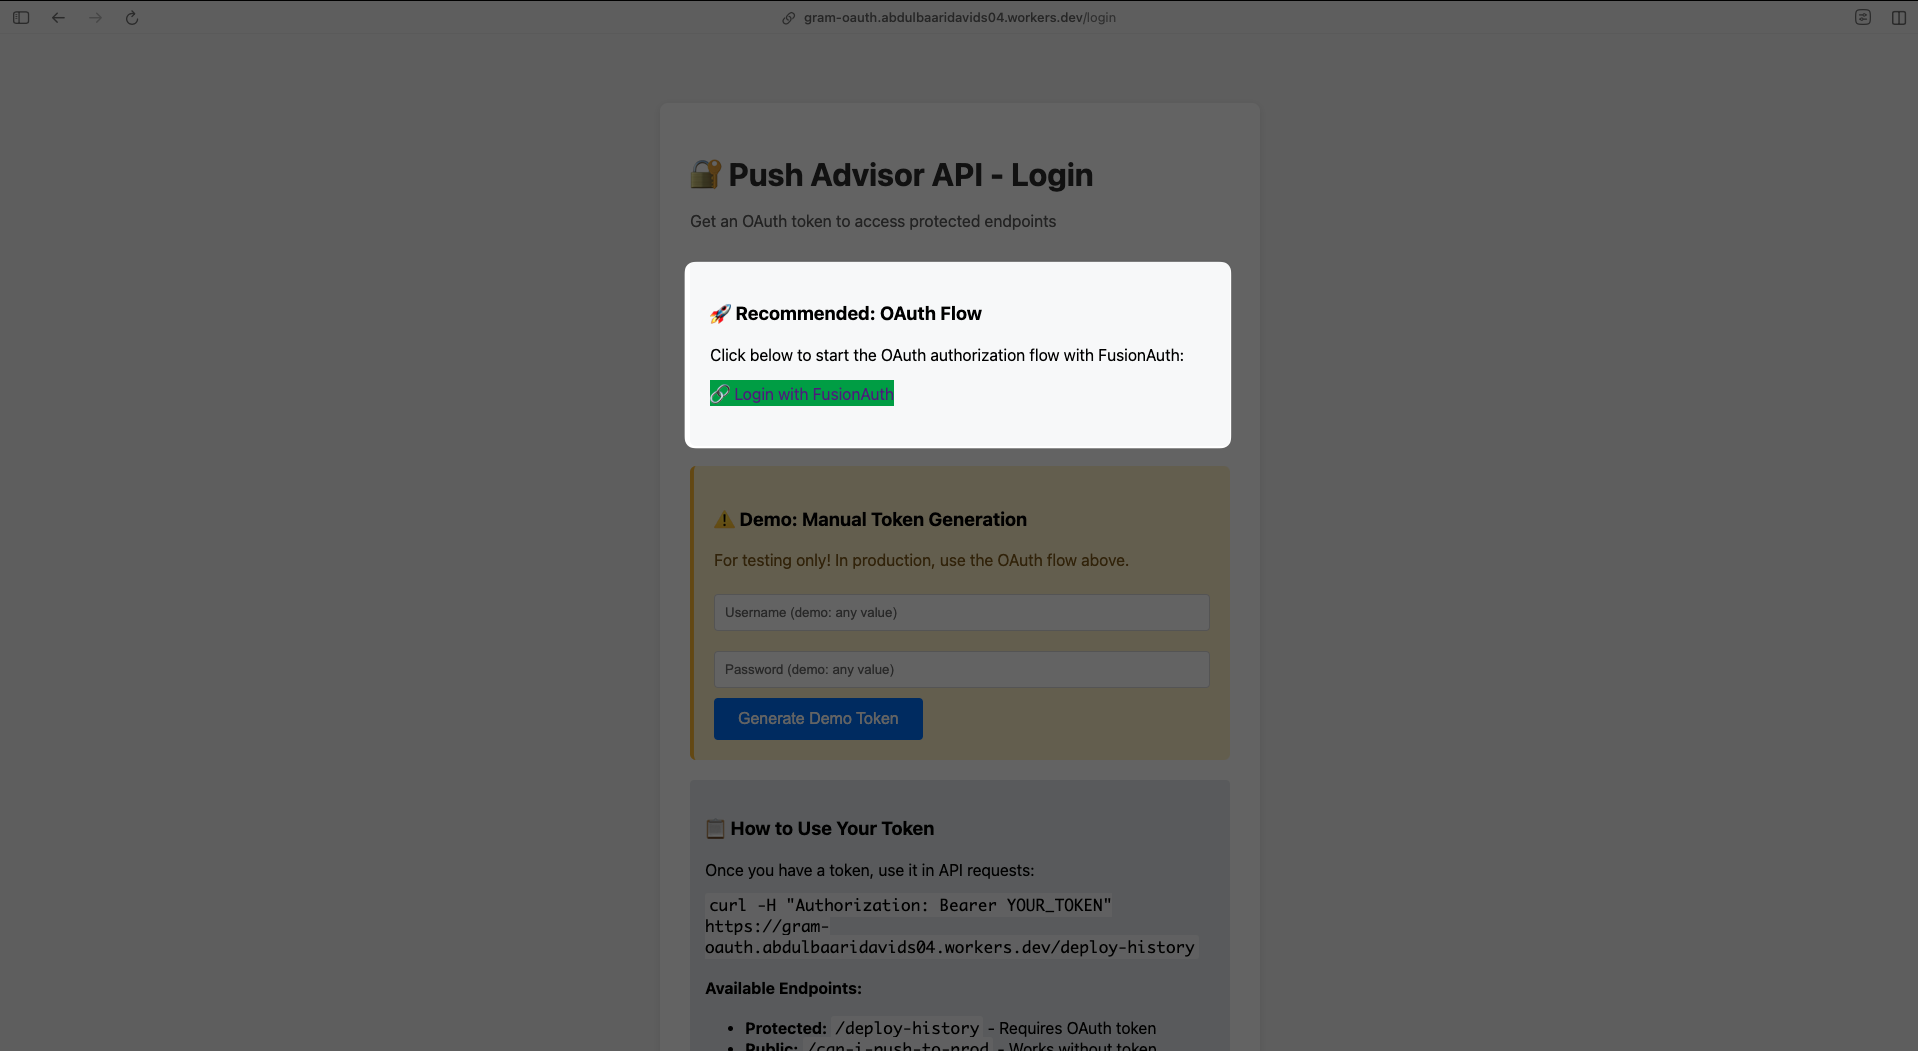
Defining OAuth in the OpenAPI document
Section titled “Defining OAuth in the OpenAPI document”Next, we’ll document our OAuth configuration in the OpenAPI document, you can read more about how Gram uses the OpenAPI document here.
openapi: 3.1.0info:  title: Push Decision API  version: 1.0.0
security:  - oauth2: [api:read, api:write]  - {}  # Allow unauthenticated access as fallback
paths:  /deploy-history:    get:      summary: Get deployment history (Protected)      security:        - oauth2: [api:read]      responses:        '200':          description: Deployment history        '401':          description: Authentication required
components:  securitySchemes:    oauth2:      type: oauth2      flows:        authorizationCode:          authorizationUrl: https://fusionauth.ritza.co/oauth2/authorize          tokenUrl: https://fusionauth.ritza.co/oauth2/token          scopes:            api:read: Read access to API endpoints            api:write: Write access to API endpoints
Configuring Gram to use OAuth
Section titled “Configuring Gram to use OAuth”Now we’ll configure Gram to work with our external OAuth server. After uploading the OpenAPI document, and creating a new toolset, go to the toolset settings page and click Connect OAuth.
In the OAuth configuration page, choose External Server instead of OAuth Proxy and enter the server slug as well as the metadata for your OAuth server.
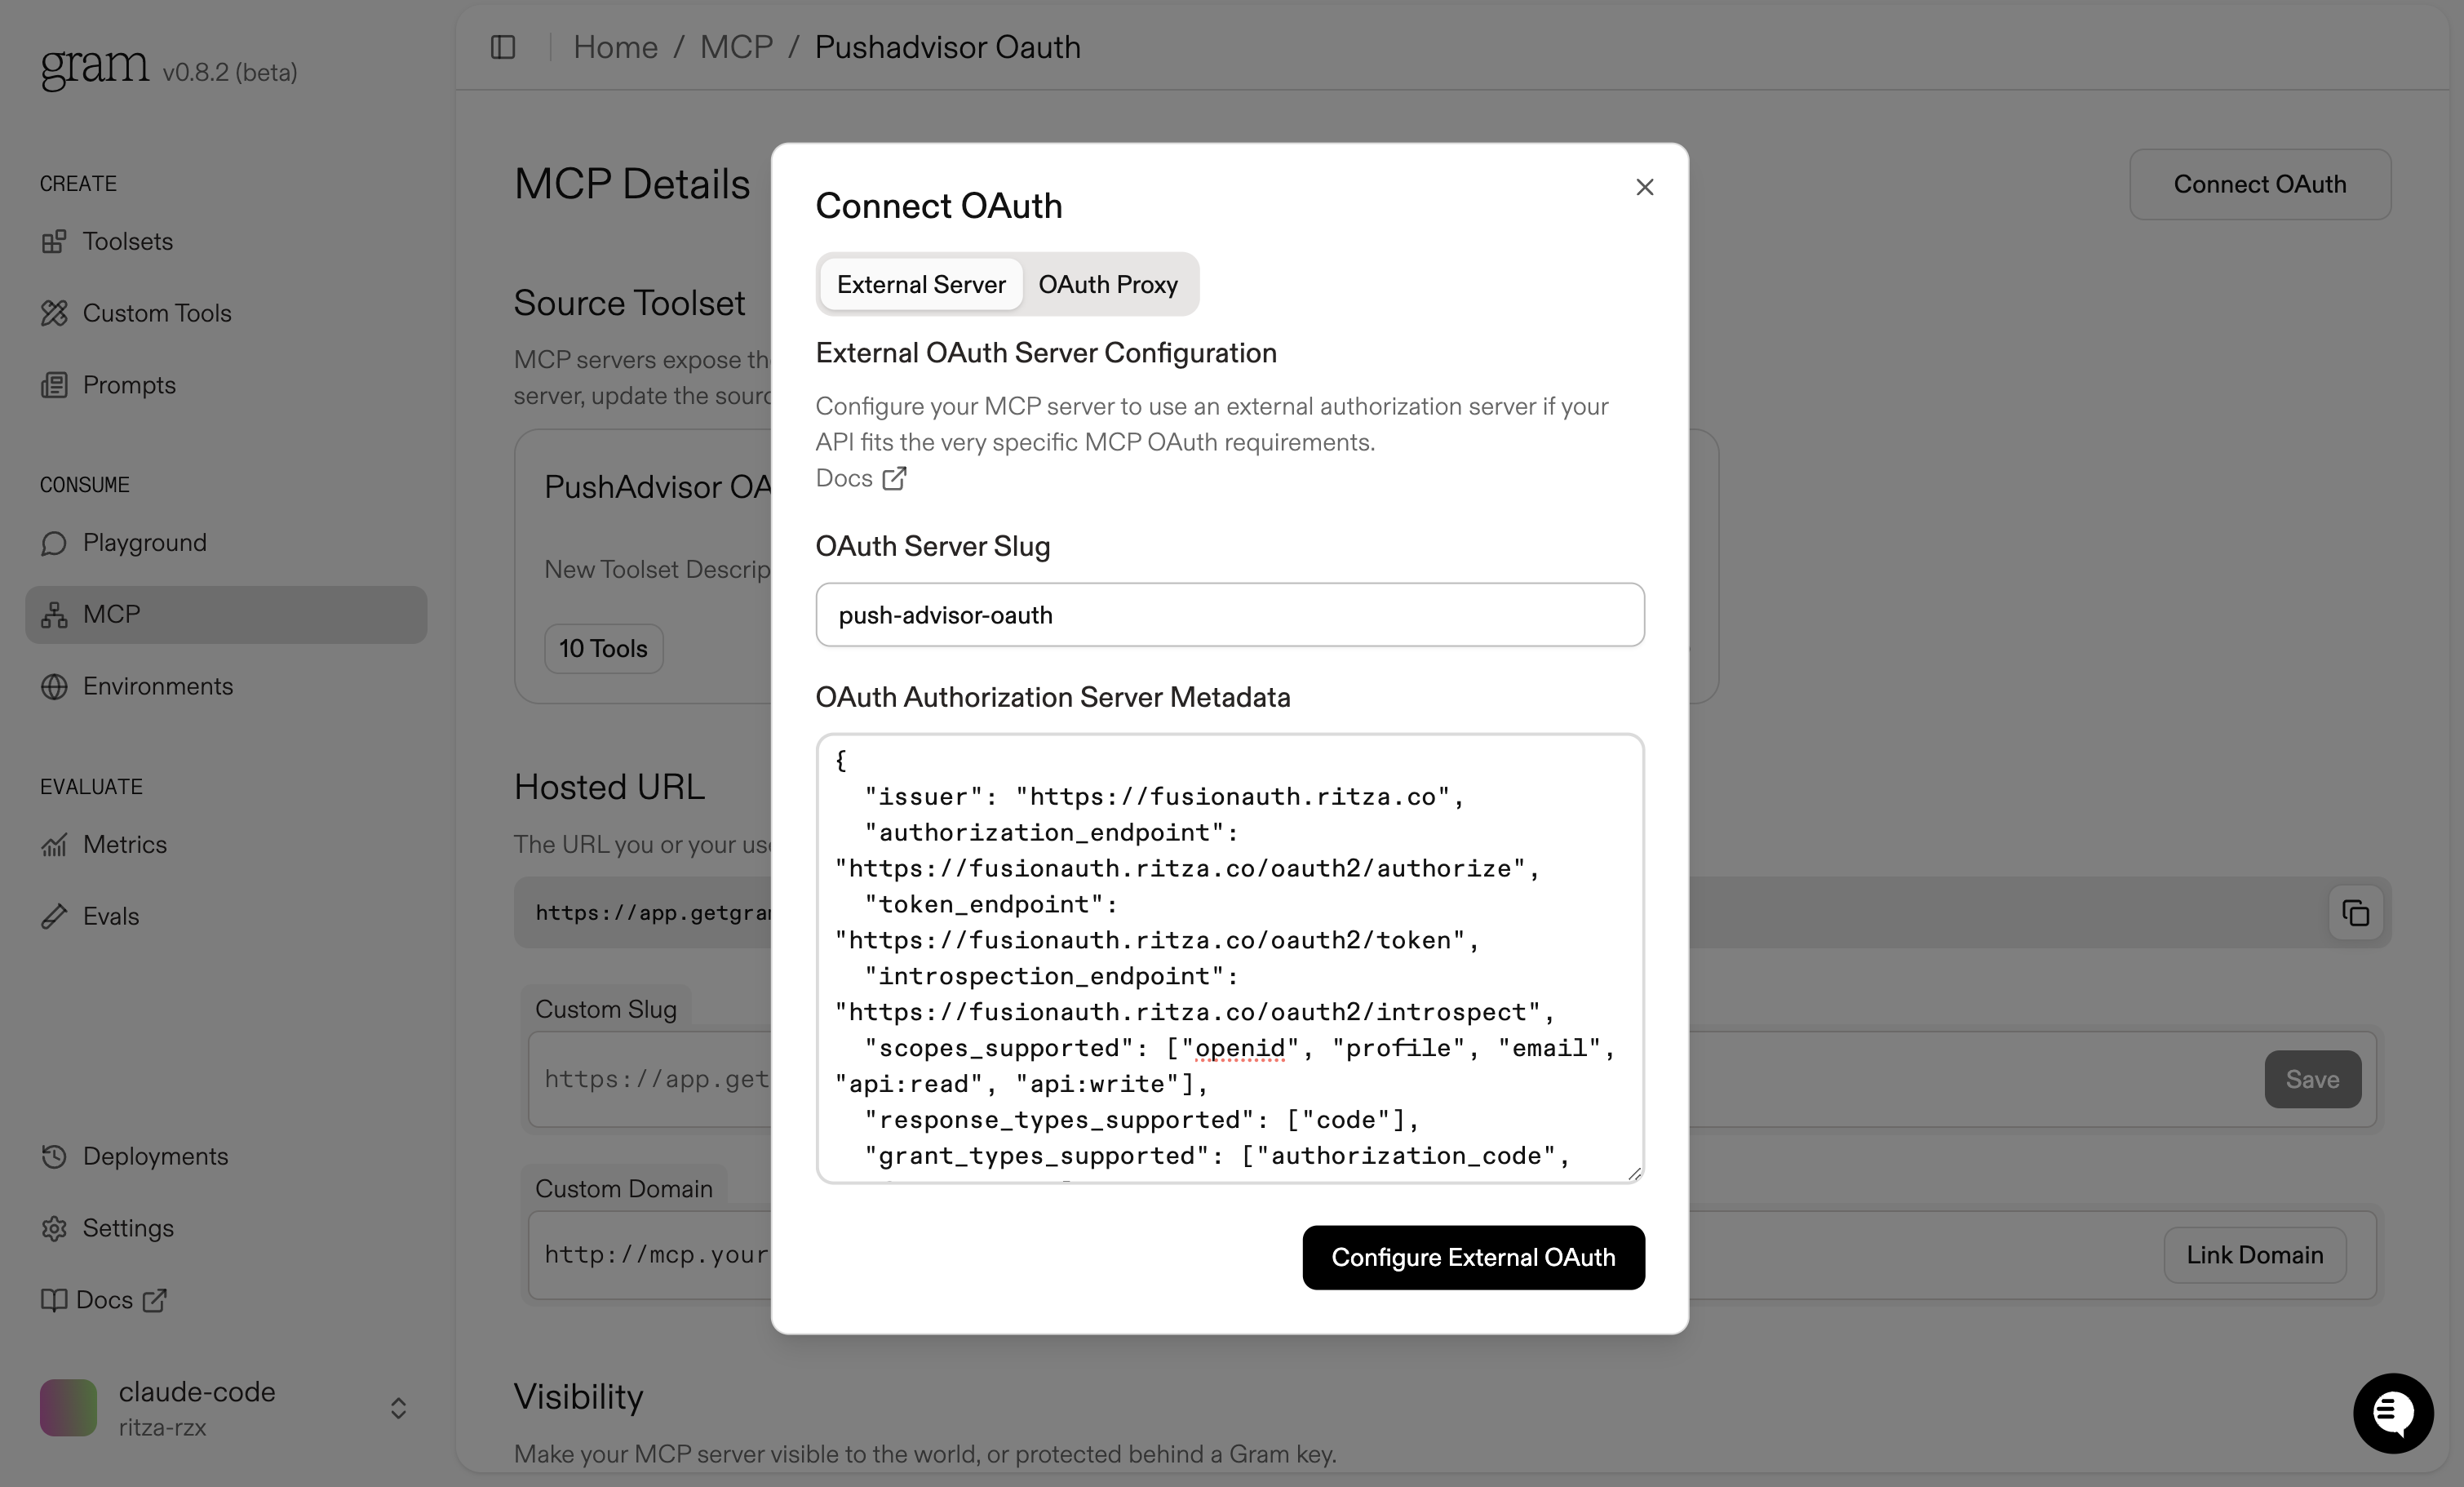
The OAuth Authorization Server Metadata is a JSON object that describes the OAuth server. It’s used by Gram to discover the OAuth server’s capabilities.
{ "issuer": "https://fusionauth.ritza.co", "authorization_endpoint": "https://fusionauth.ritza.co/oauth2/authorize", "token_endpoint": "https://fusionauth.ritza.co/oauth2/token", "introspection_endpoint": "https://fusionauth.ritza.co/oauth2/introspect", "userinfo_endpoint": "https://fusionauth.ritza.co/oauth2/userinfo", "jwks_uri": "https://fusionauth.ritza.co/.well-known/jwks.json", "registration_endpoint": "https://fusionauth.ritza.co/oauth2/register", "response_types_supported": ["code"], "response_modes_supported": ["query", "form_post"], "grant_types_supported": ["authorization_code", "refresh_token", "client_credentials"], "subject_types_supported": ["public"], "id_token_signing_alg_values_supported": ["RS256"], "scopes_supported": ["openid", "profile", "email", "api:read", "api:write"], "token_endpoint_auth_methods_supported": ["client_secret_basic", "client_secret_post", "none"], "claims_supported": ["aud", "exp", "iat", "iss", "sub", "email", "email_verified", "preferred_username", "scope"], "code_challenge_methods_supported": ["plain", "S256"], "introspection_endpoint_auth_methods_supported": ["client_secret_basic", "client_secret_post"], "registration_endpoint_auth_methods_supported": ["client_secret_basic", "client_secret_post", "none"] }You can read more about the OAuth Authorization Server Metadata here.
Testing in Gram playground
Section titled “Testing in Gram playground”Finally, let’s test everything in the Gram playground.
After uploading our OpenAPI document and creating a toolset, we’ll go to the playground to test it. When we ask the AI agent to get deployment history, it will automatically detect that OAuth authentication is required:
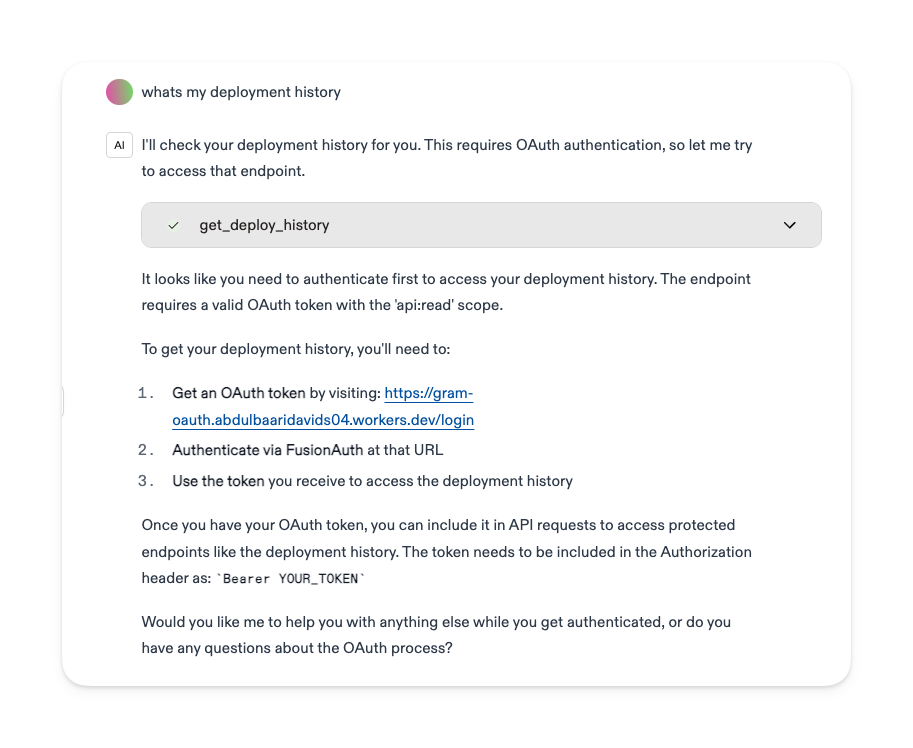
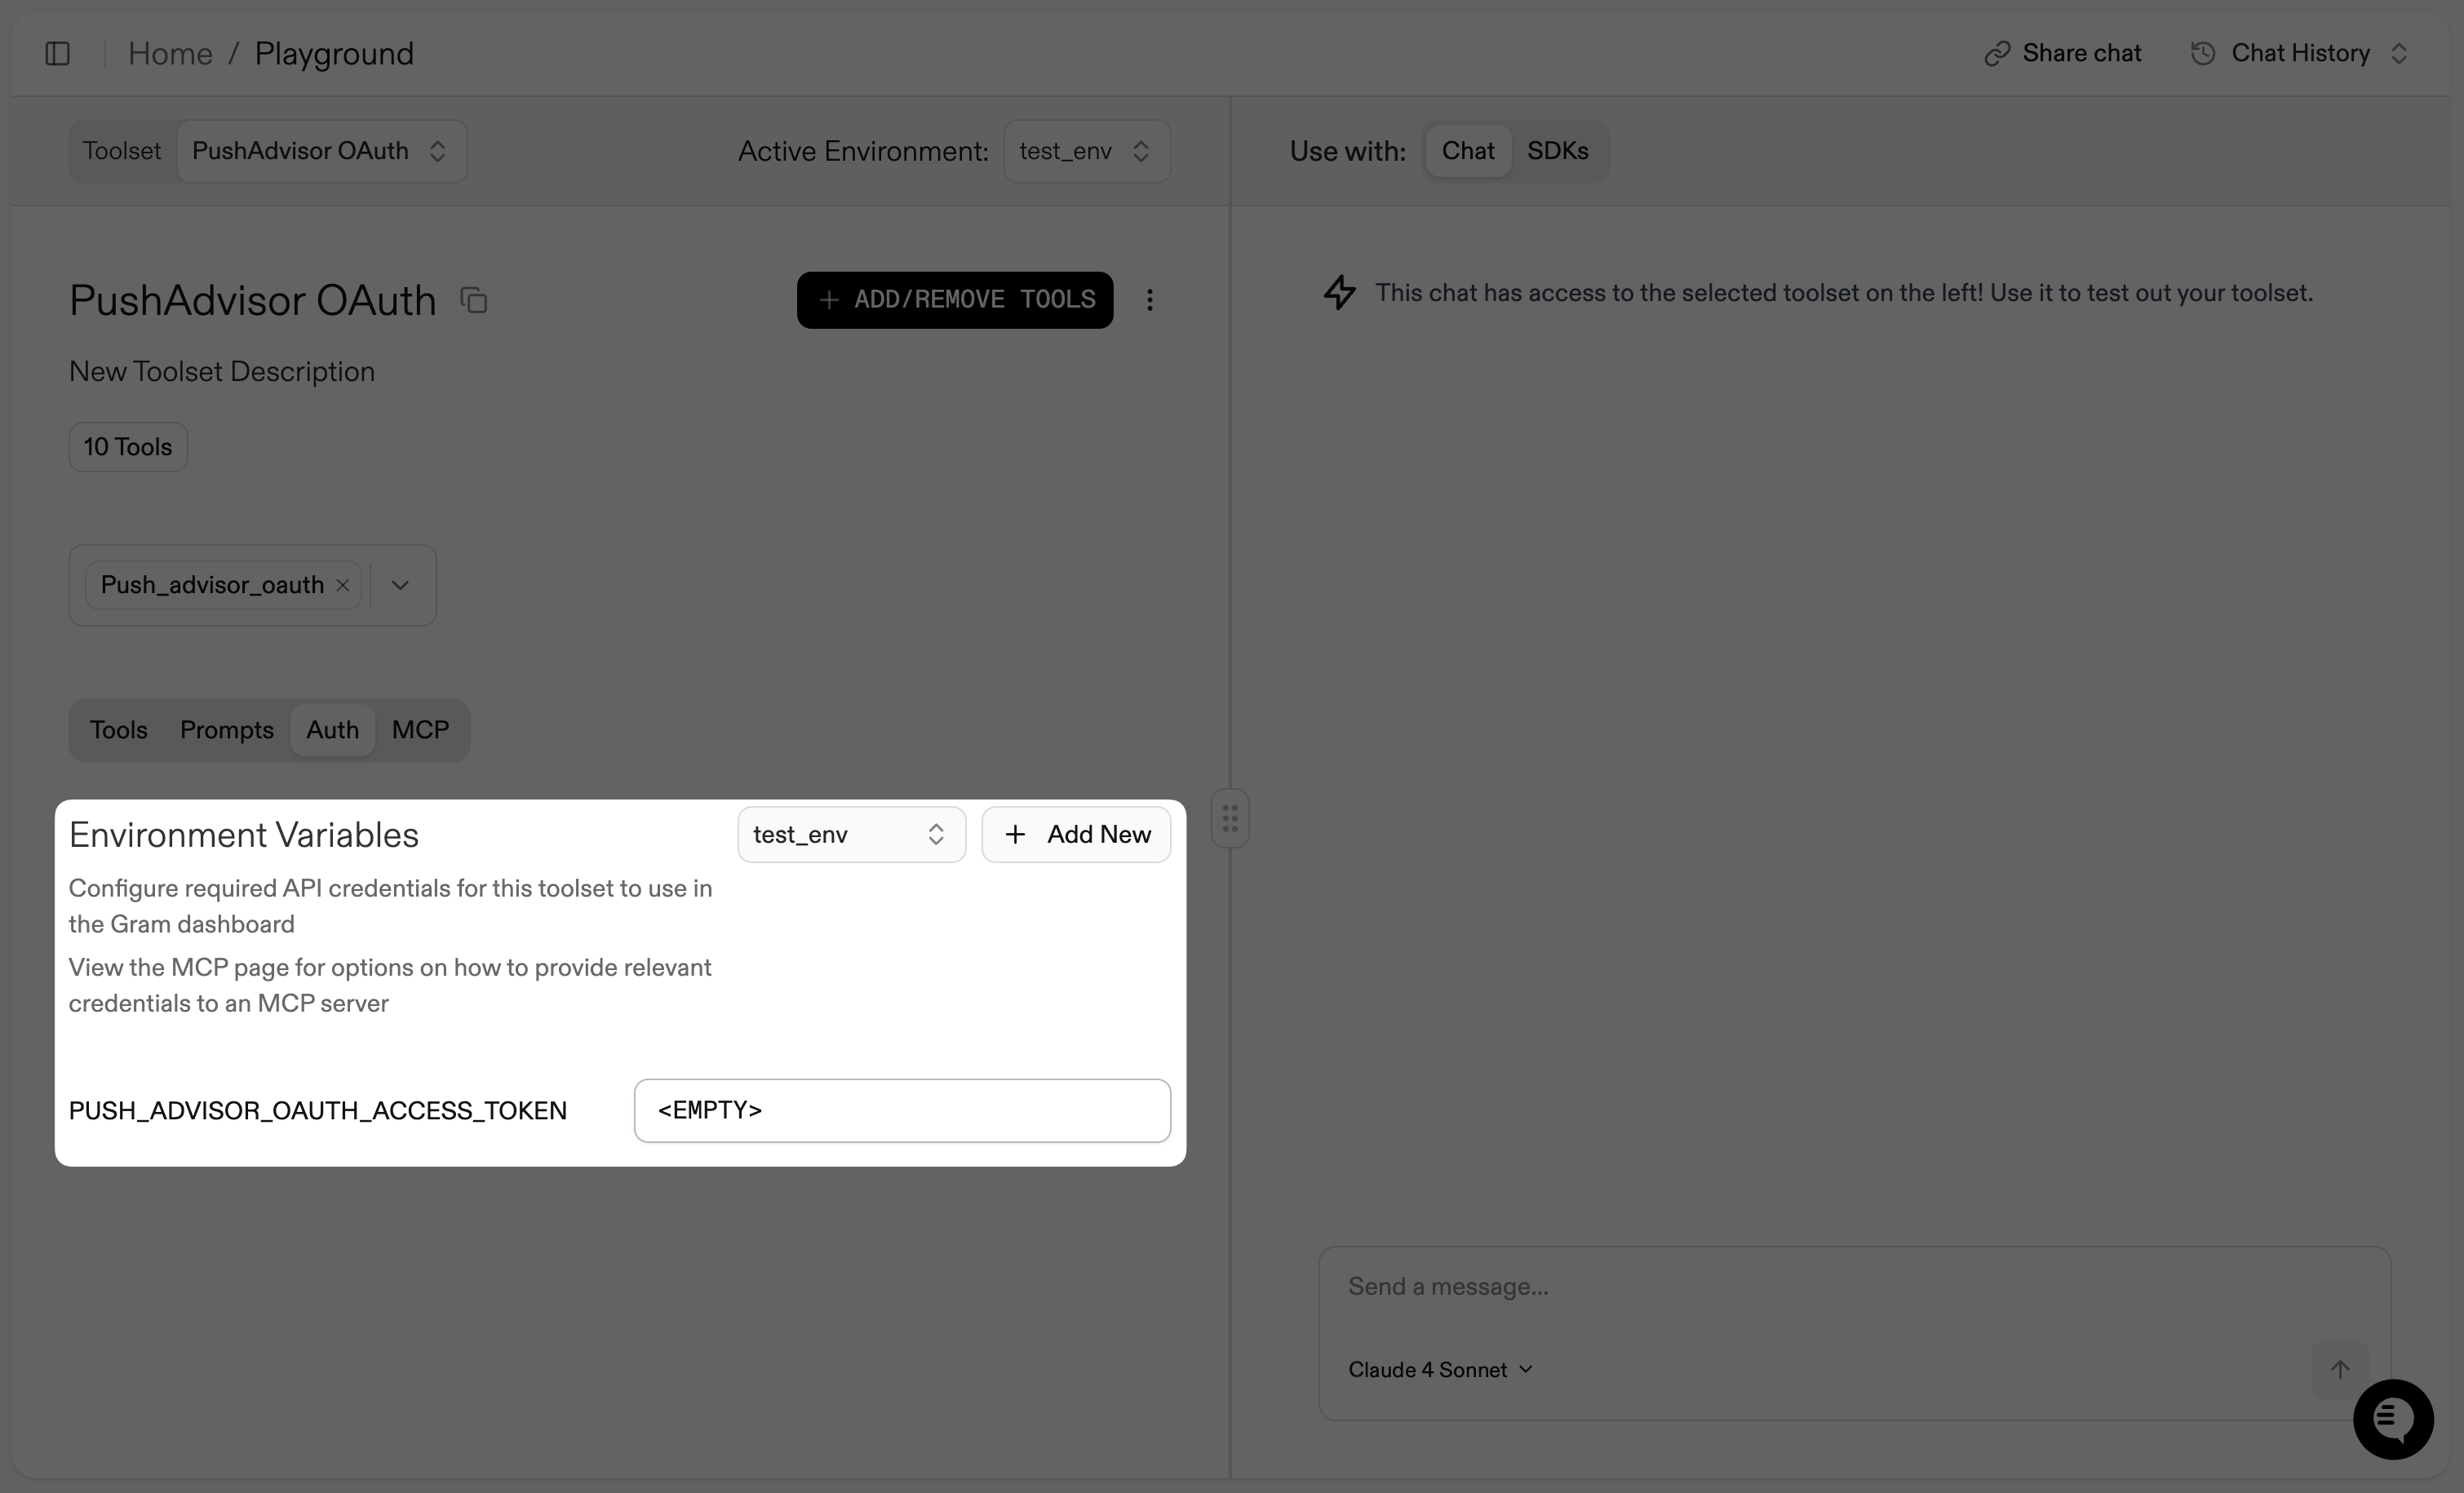
Notice how the environment variables section shows PUSH_ADVISOR_OAUTH_ACCESS_TOKEN is <EMPTY>, and the agent tells us exactly what we need to do to authenticate. The agent can also discover the OAuth requirements automatically by calling the discovery endpoint.
we can see that an OAuth access token is required but not yet provided:
Getting an OAuth token
Section titled “Getting an OAuth token”To test our protected endpoints, we need to get a valid OAuth token. Here’s how a user would get an OAuth token:
- Visit the login page: First, we go to the
/loginpage provided by the API to start the authentication process

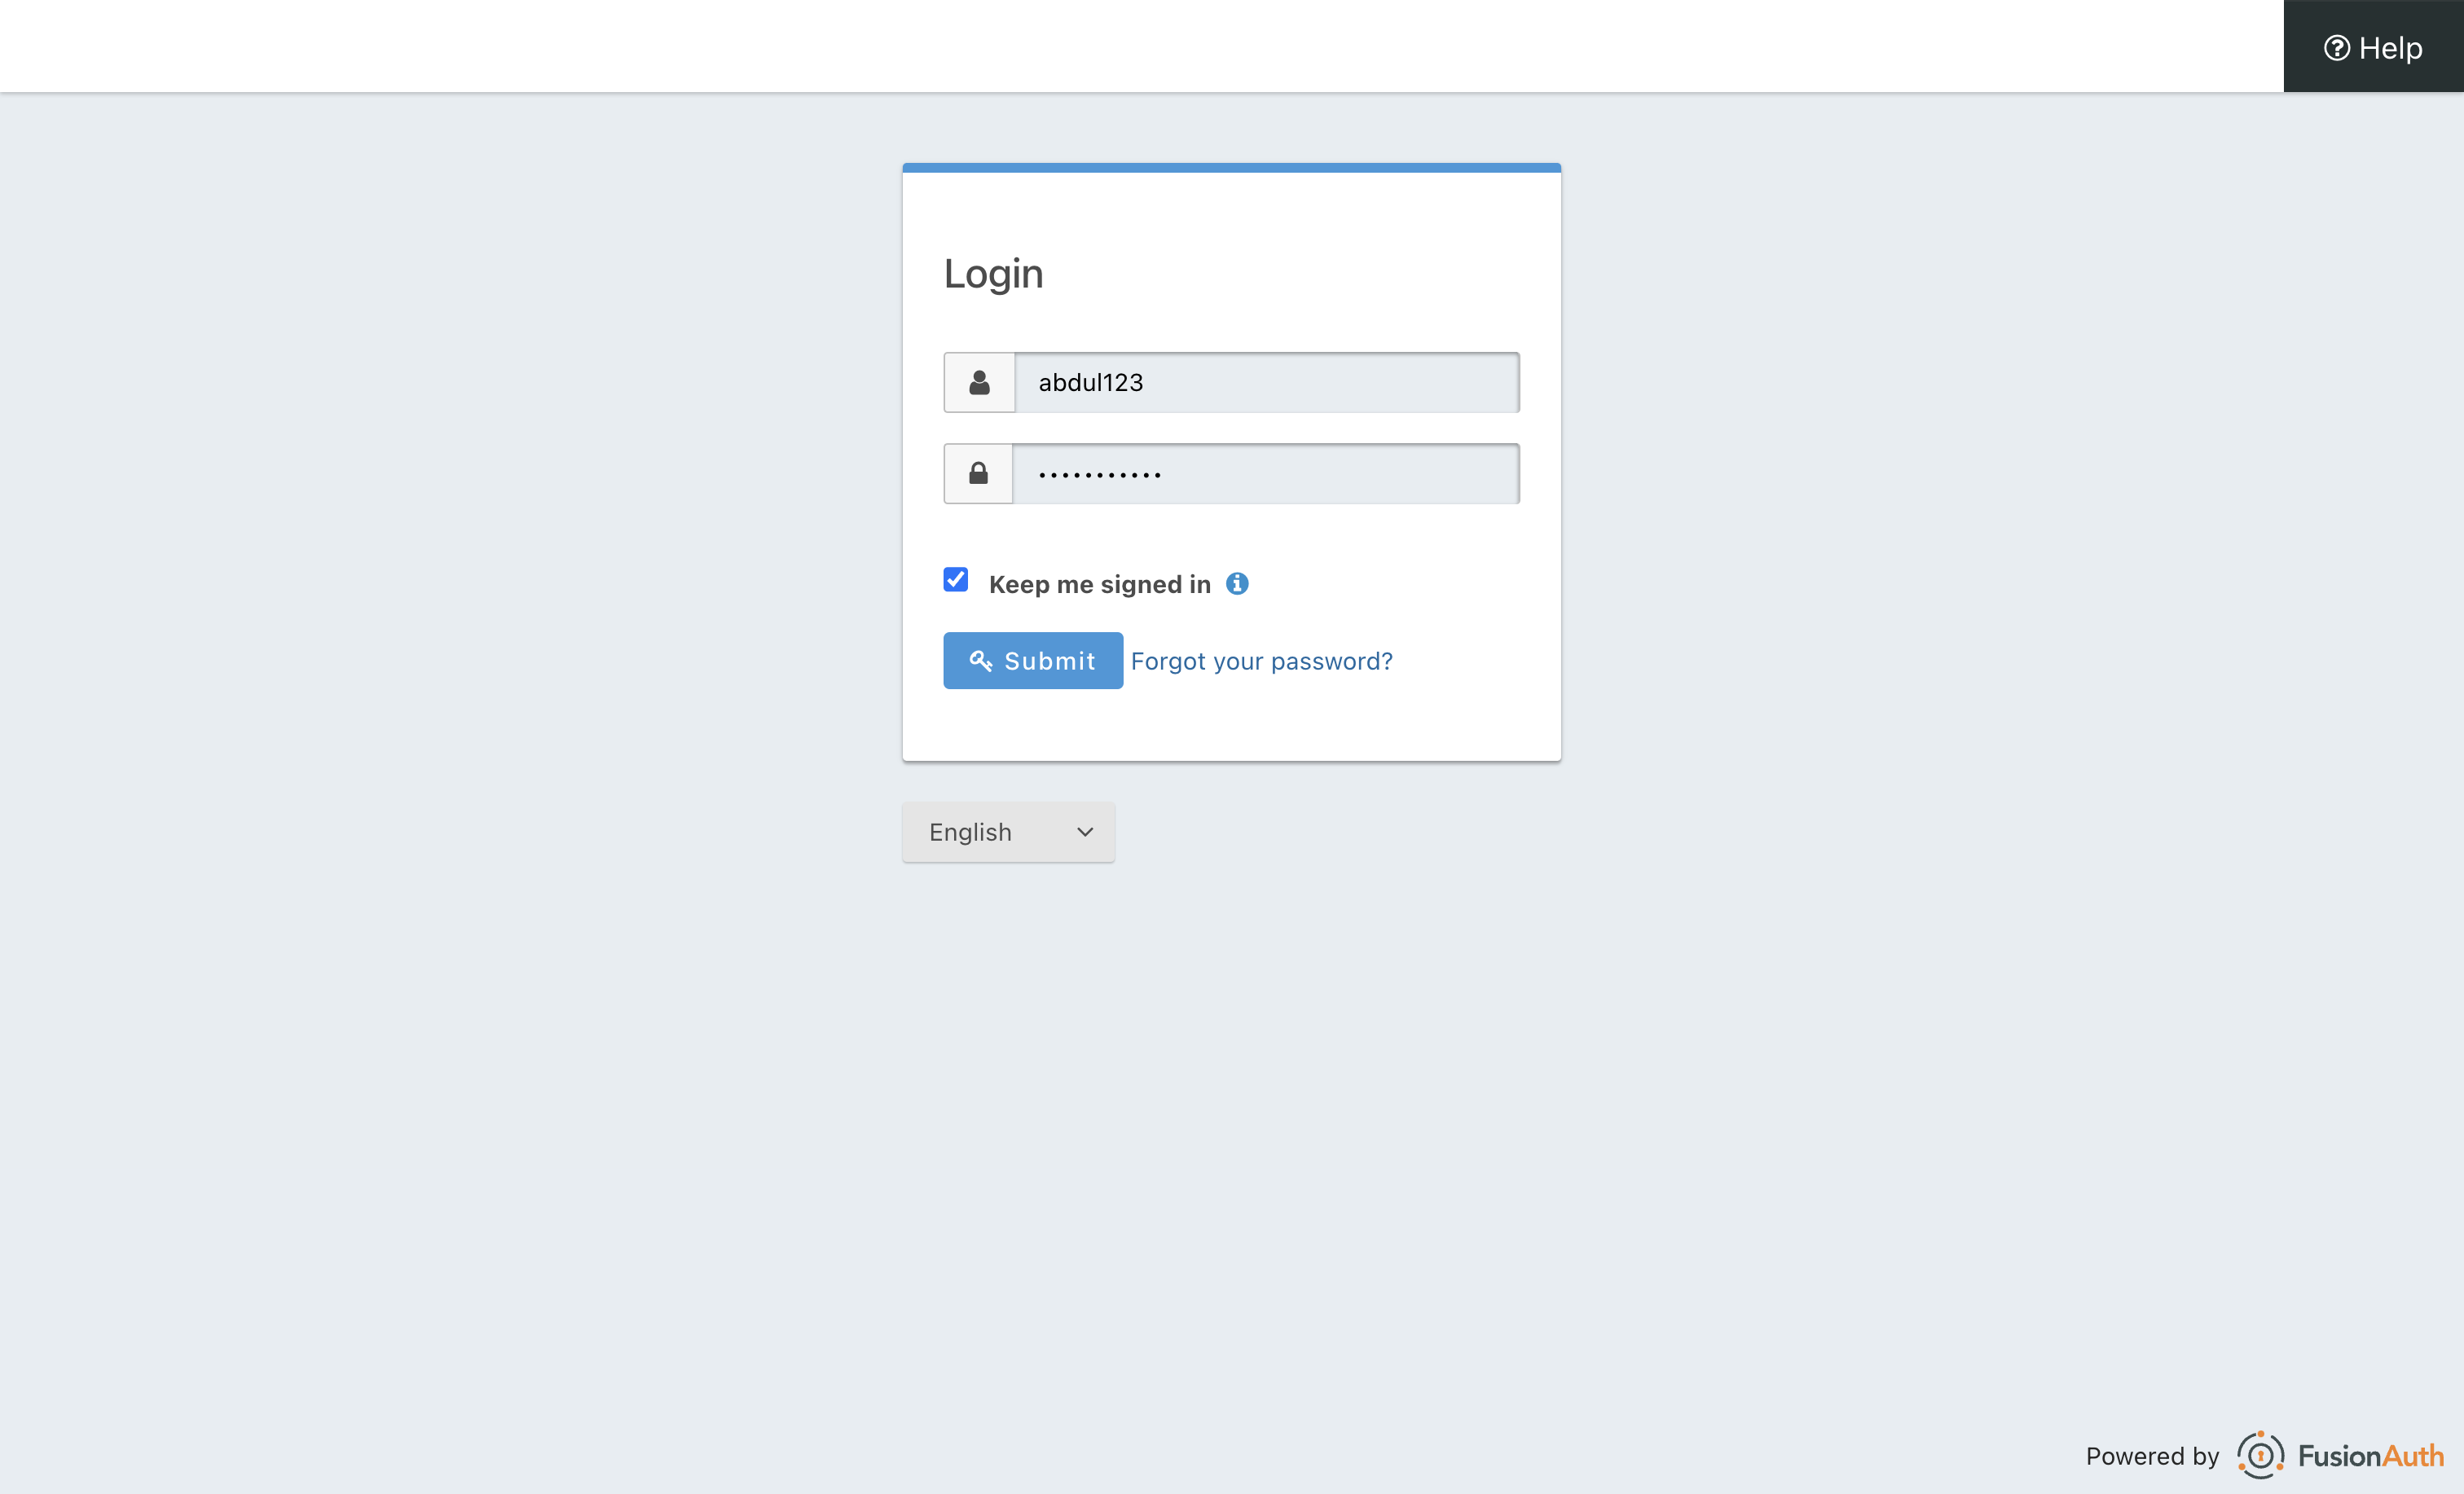
- Redirect to OAuth Provider: Click “Login with OAuth Provider” which redirects to your OAuth provider’s login screen (in this example, FusionAuth):
-
Complete authentication: After logging in, your OAuth provider redirects back to our API with an authorization code
-
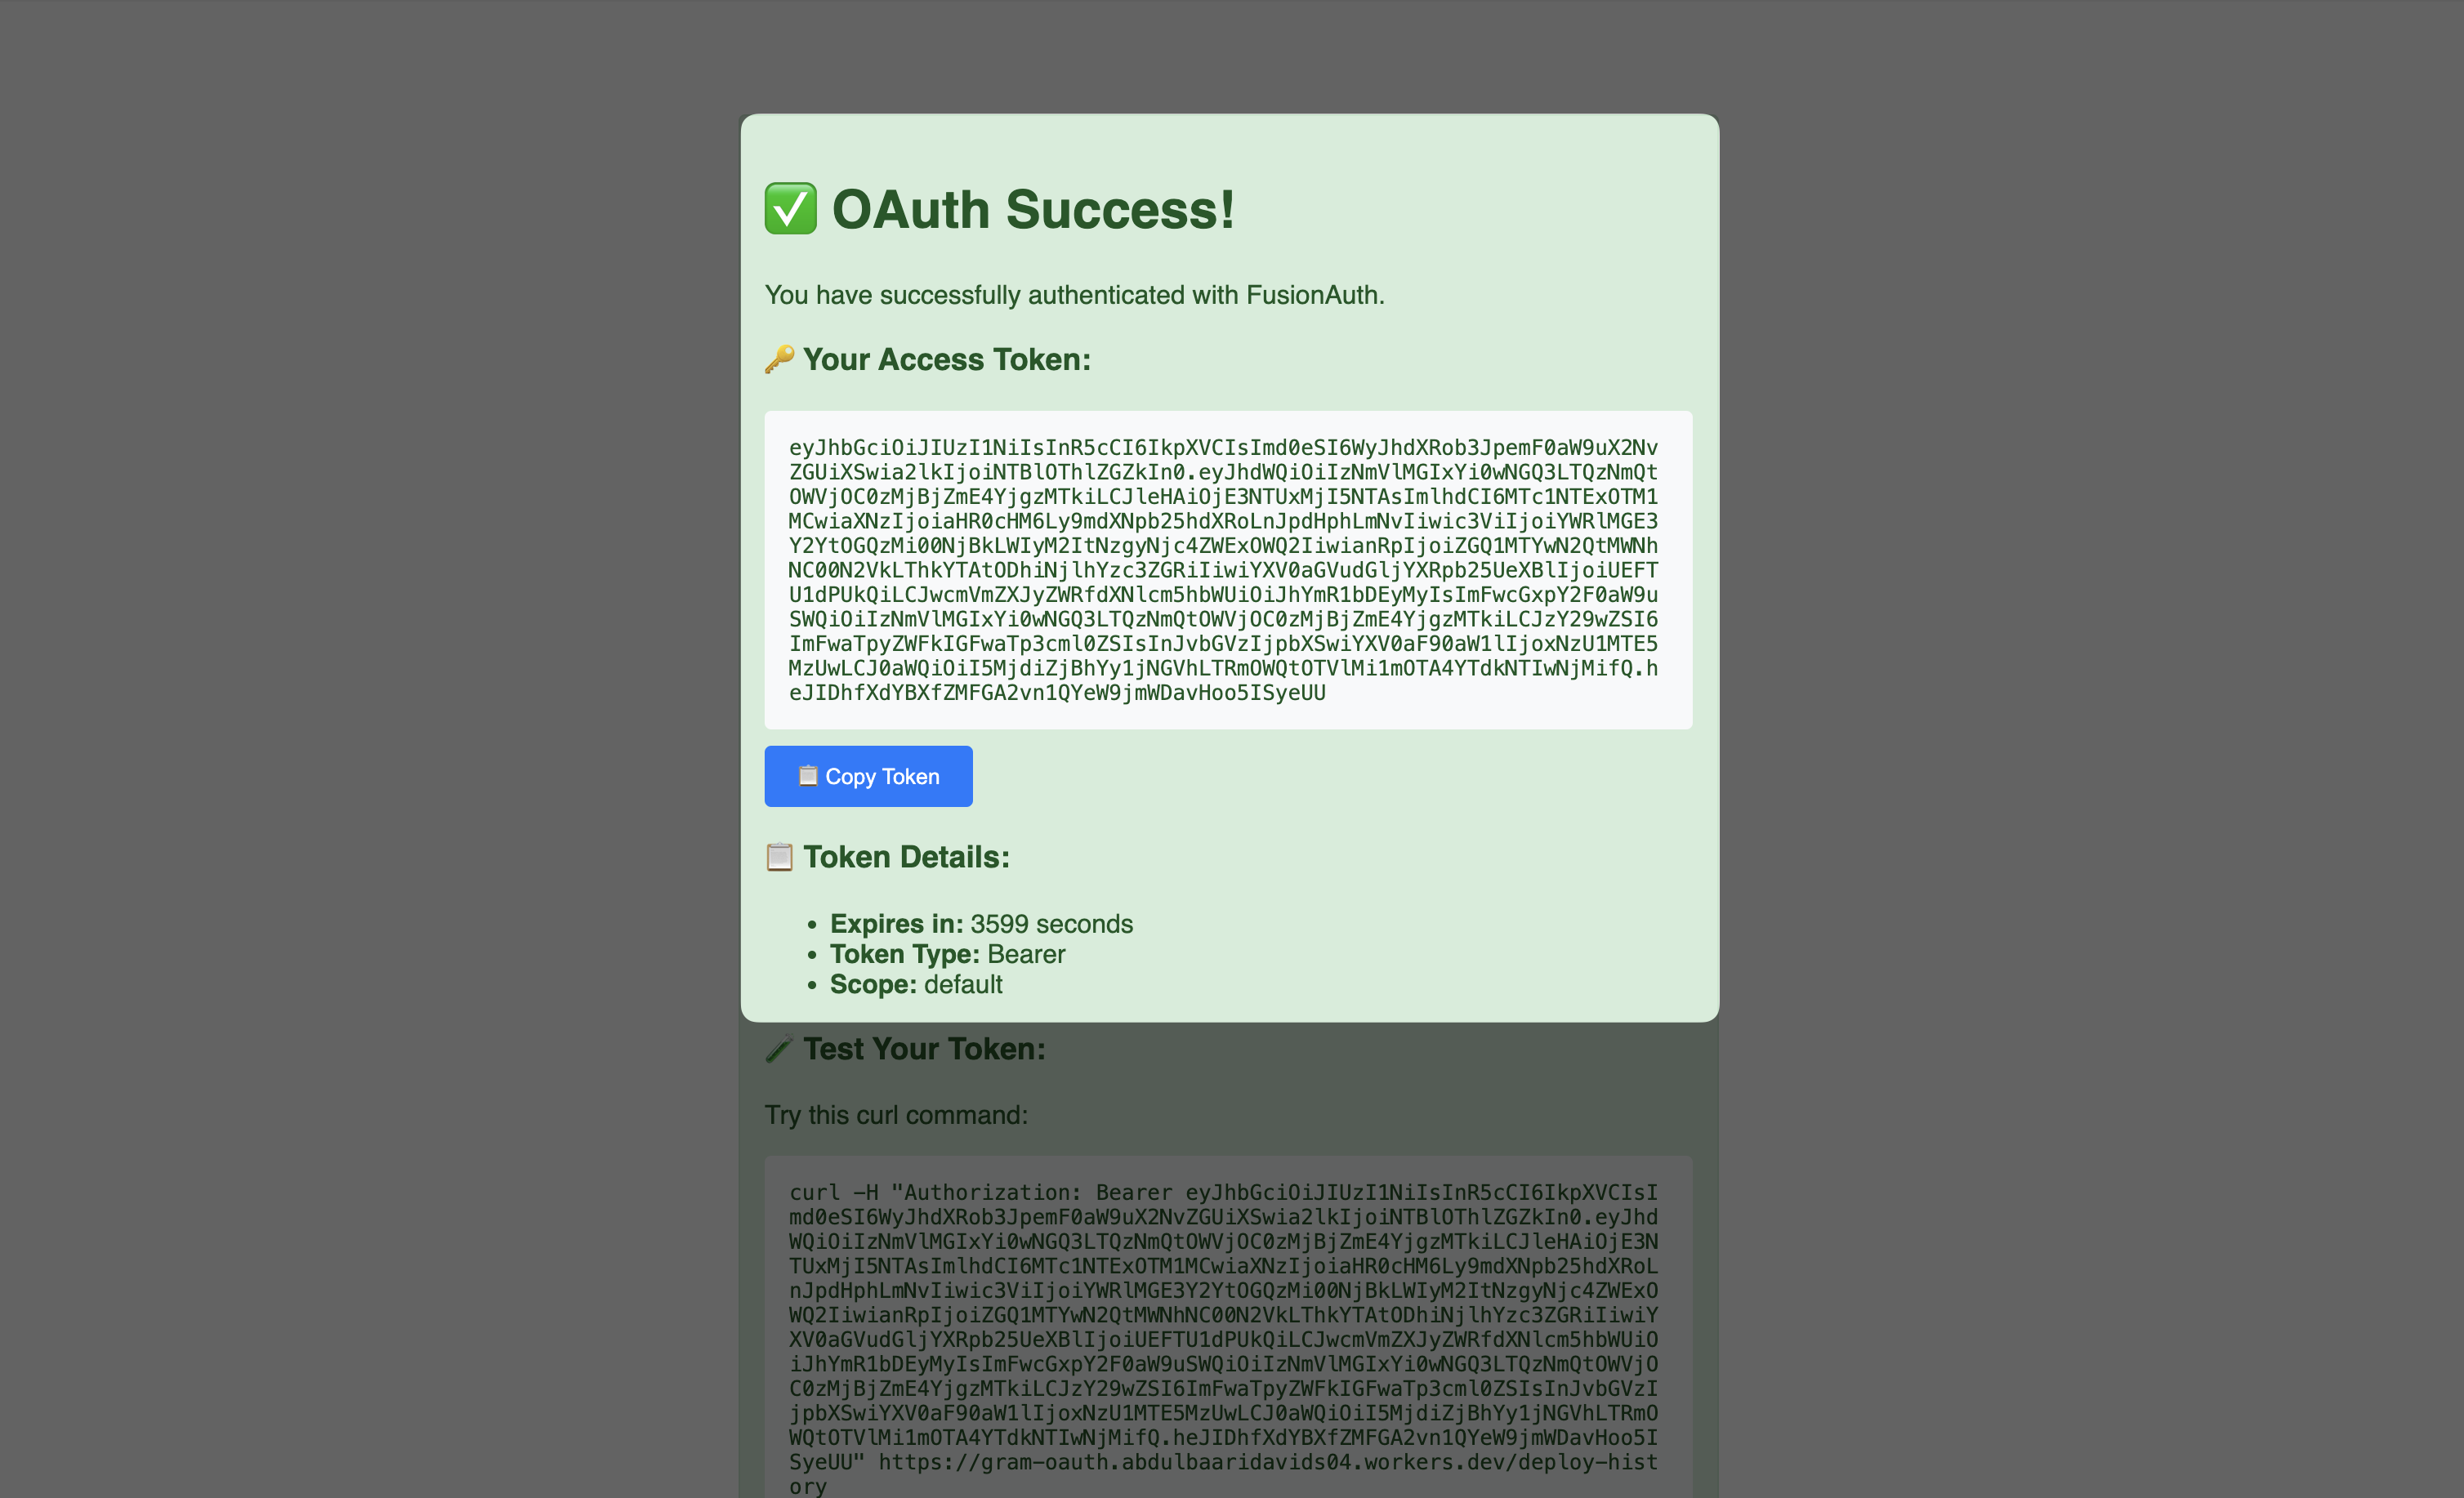
Get the access token: Copy the access token from the success page
Adding the token to Gram
Section titled “Adding the token to Gram”Now we can add our OAuth token to the Authentication environment variables in Gram:
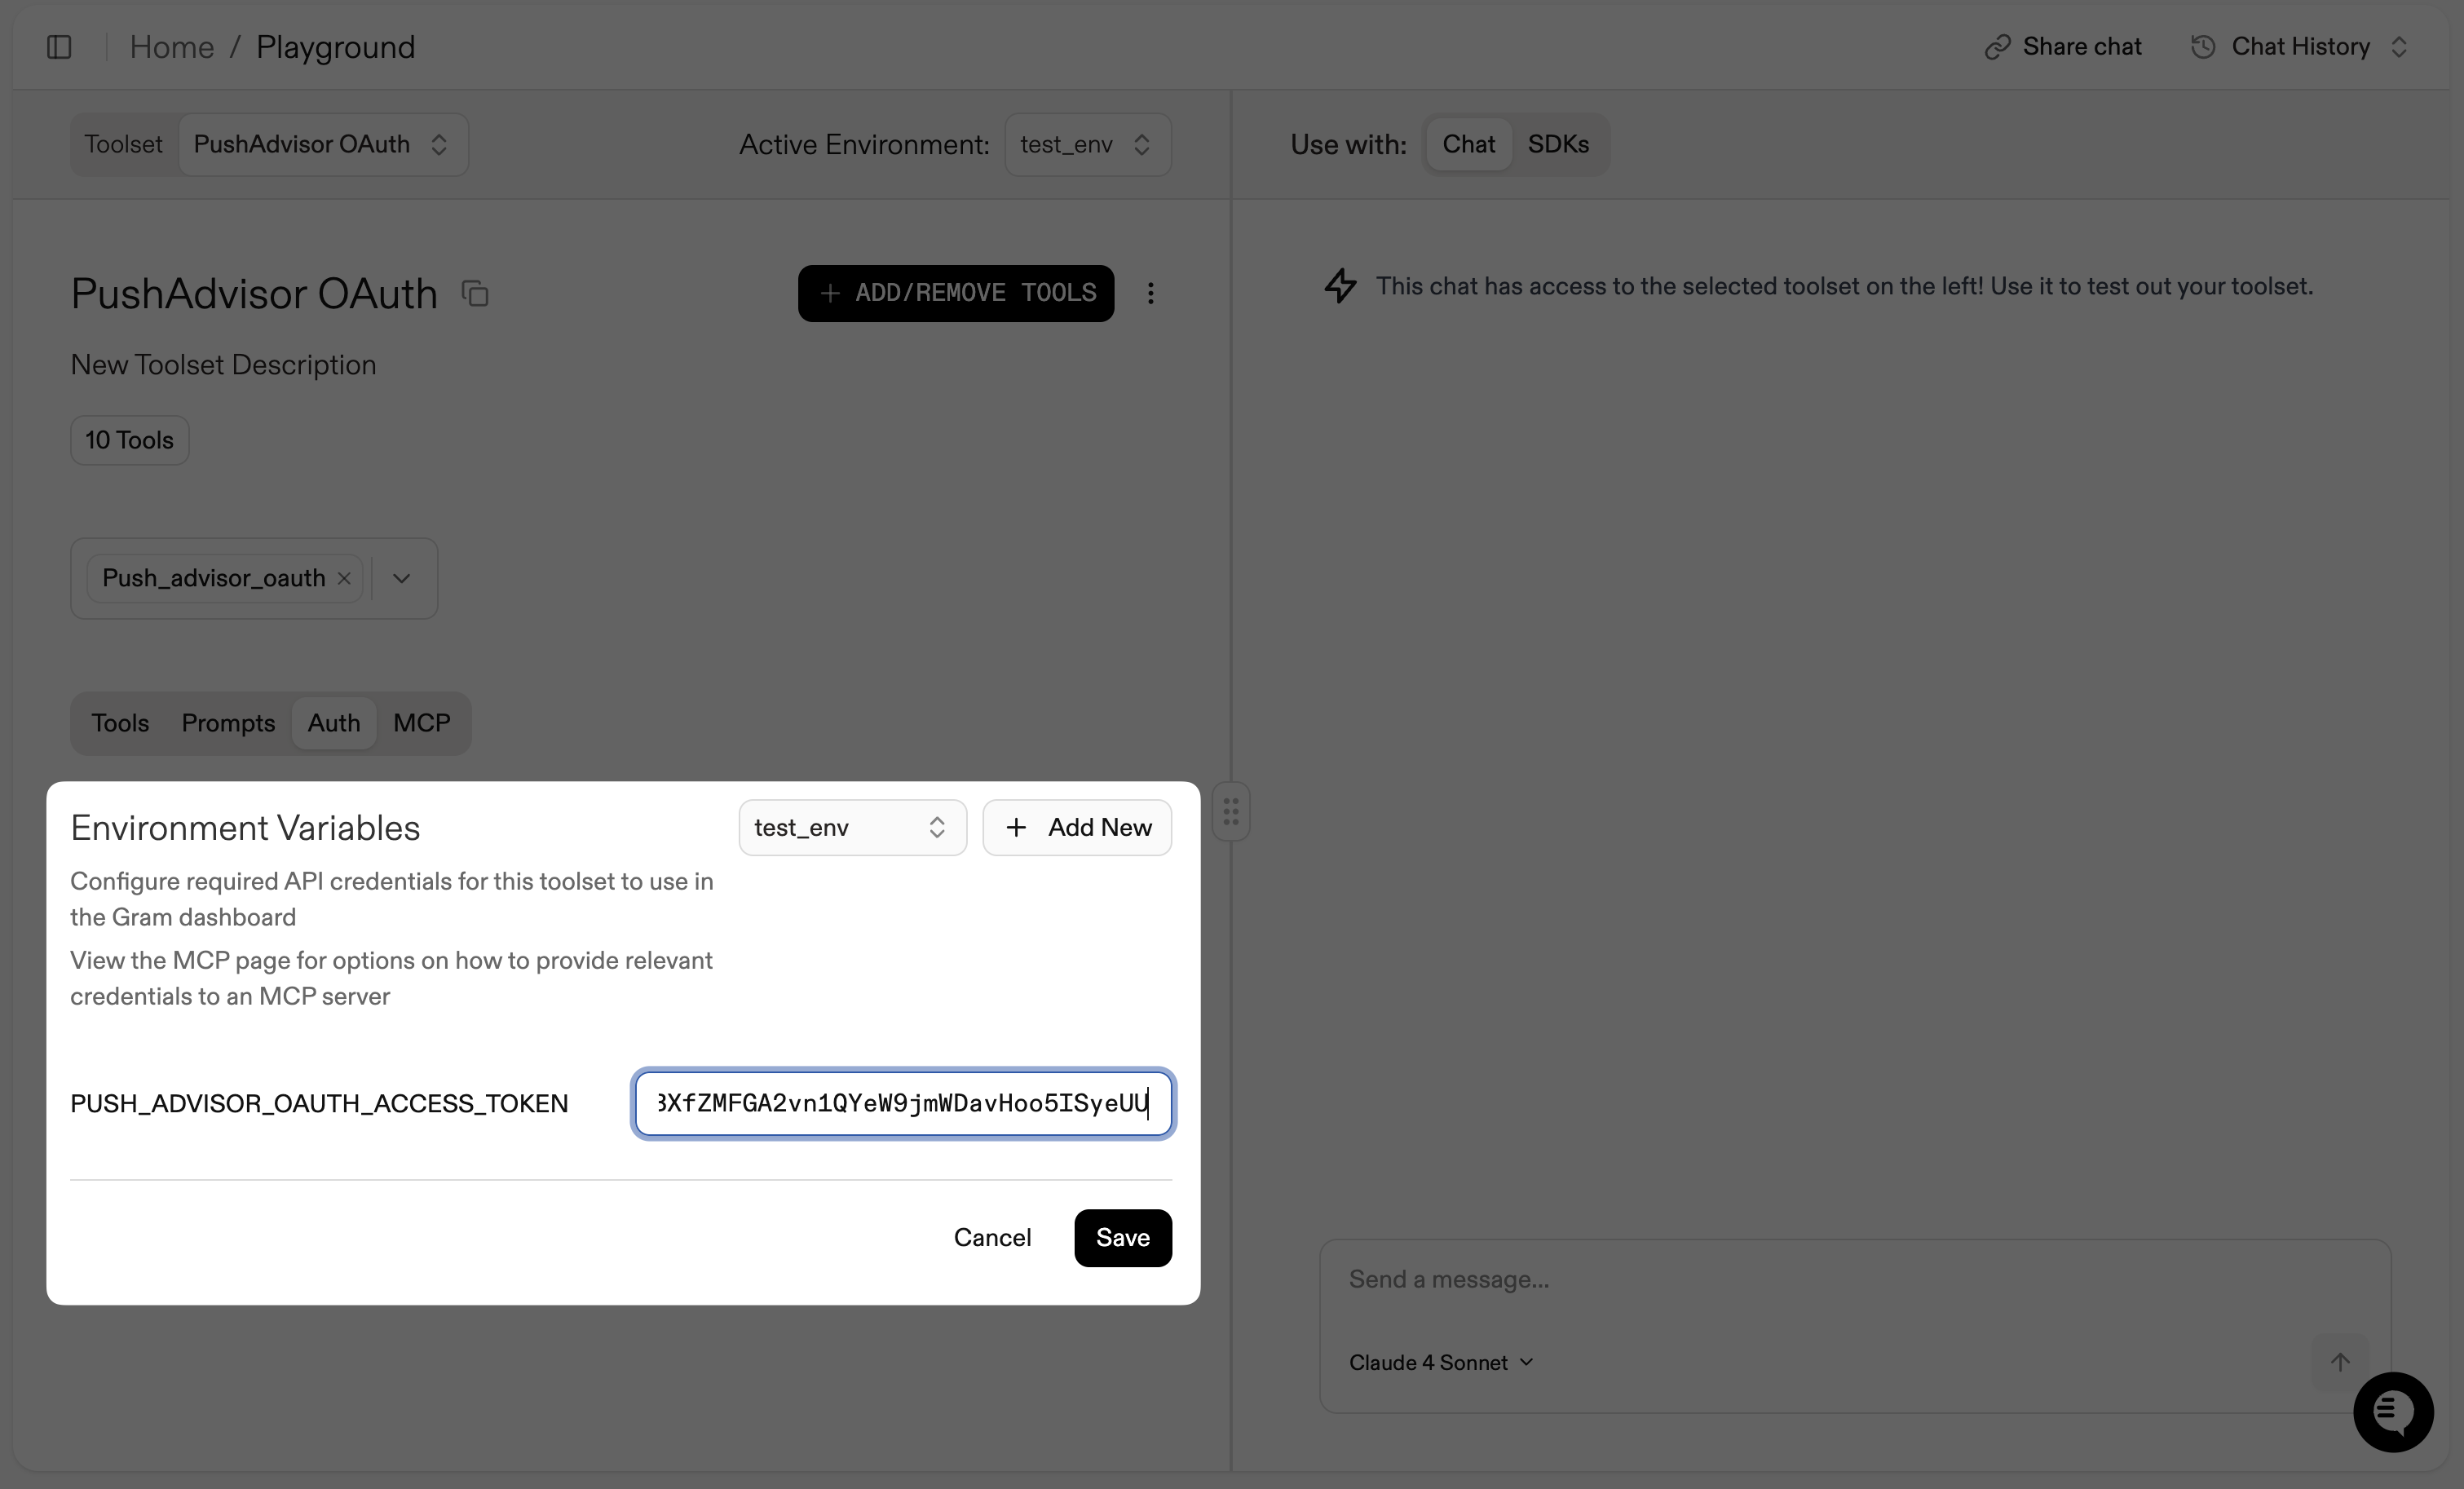
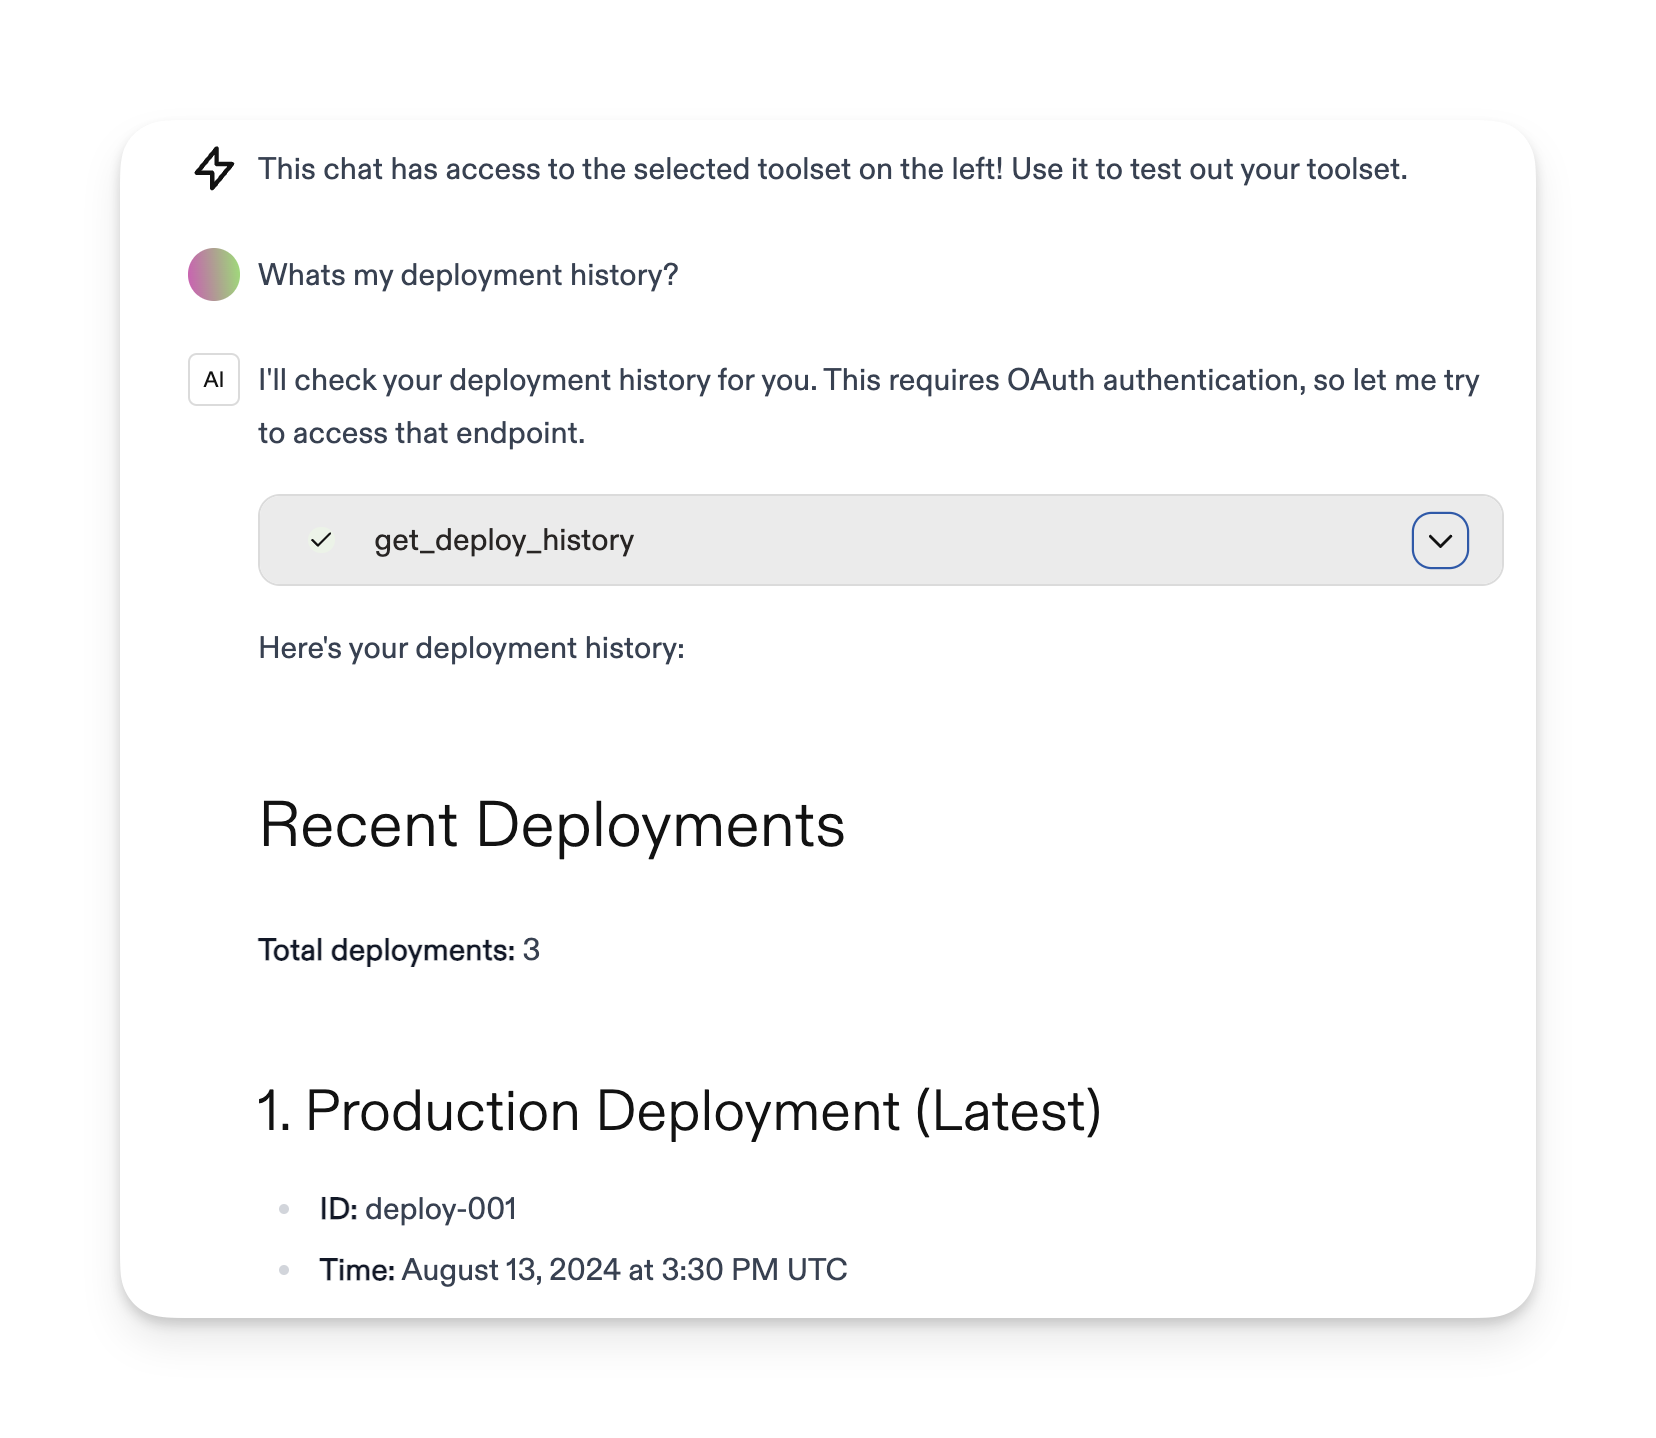
Once we’ve added a valid OAuth token, we can test the protected endpoints in the playground:
Troubleshooting
Section titled “Troubleshooting”OAuth is a complex topic, and there are many ways to configure it. Here are some common issues and how to troubleshoot them.
Common issues
Section titled “Common issues”Invalid redirect URI: Ensure all redirect URLs are configured in your OAuth provider
Token validation fails: Check that your client credentials are correct and the OAuth provider is accessible
CORS issues: Include proper CORS headers for browser-based OAuth flows
Scope mismatches: Verify that requested scopes match what’s configured in your OAuth provider