Using Claude Desktop with Gram-hosted MCP servers
Claude Desktop is Anthropic’s standalone AI assistant application that supports MCP through a JSON configuration file.
When combined with Model Context Protocol (MCP) servers, Claude Desktop becomes even more powerful. Using MCP servers, you can give Claude access to your tools and infrastructure, allowing it to work with your APIs, databases, and other services.
This guide shows you how to connect Claude Desktop to a Gram-hosted MCP server using Taskmaster, a full-stack CRUD application for task and project management. Taskmaster includes a web UI for managing projects and tasks, a built-in HTTP API, OAuth 2.0 authentication, and a Neon PostgreSQL database for storing data. Try the demo app to see it in action.
You’ll learn how to set up the connection, test it, and use natural language to manage tasks, projects, and workflows through Claude Desktop.
Find the full code and OpenAPI document in the Taskmaster repository.
Prerequisites
Section titled “Prerequisites”To follow this tutorial, you need:
- A Gram account
- Claude Desktop installed
Creating an MCP server
Section titled “Creating an MCP server”Before connecting Claude Desktop to a Taskmaster MCP server, you first need to create one. Follow our guide to creating a Taskmaster MCP server.
Once your Taskmaster MCP server is ready, there are two ways you can connect it to Claude Desktop:
- Use the MCP configuration file in Claude Desktop.
- Use the Claude Connectors feature to connect directly to your Gram-hosted MCP server.
Connecting Claude Desktop to your Gram-hosted MCP server using the MCP configuration file
Section titled “Connecting Claude Desktop to your Gram-hosted MCP server using the MCP configuration file”1. Access the Claude Desktop settings
Section titled “1. Access the Claude Desktop settings”In Claude Desktop, open settings:
- macOS: Go to Claude -> Settings… from the menu bar.
- Windows: Access settings through the application menu.
2. Open the MCP configuration
Section titled “2. Open the MCP configuration”Select Developer from the left sidebar, then click Edit Config. This will create or open the MCP configuration file at:
- macOS:
~/Library/Application Support/Claude/claude_desktop_config.json - Windows:
%APPDATA%\Claude\claude_desktop_config.json
3. Add the MCP server configuration
Section titled “3. Add the MCP server configuration”Add your Taskmaster MCP server configuration to the file.
-
For Pass-through Authentication, the configuration looks like this:
{"mcpServers": {"GramTaskmaster": {"command": "npx","args": ["mcp-remote","https://app.getgram.ai/mcp/your-taskmaster-slug","--header","MCP-TASKMASTER-API-KEY:<your-key-here>"]}}} -
For a Managed Authentication server, the configuration looks like:
{"mcpServers": {"GramTaskmaster": {"command": "npx","args": ["mcp-remote","https://app.getgram.ai/mcp/your-taskmaster-slug","--header","Authorization: ${GRAM_KEY}"],"env": {"GRAM_KEY": "Bearer <your-gram-api-key>"}}}}
Replace your-taskmaster-slug with your slug from your Taskmaster MCP server configuration and <your-gram-api-key> with your Gram API key.
4. Test the connection
Section titled “4. Test the connection”Save the configuration file, then close Claude Desktop completely and reopen it. When the application has restarted, click the hamburger icon in the chat field to see the available tools.
Test the connection by asking:
Create a new task called "Test MCP connection" with description "Verify that the Taskmaster MCP server is working correctly"Claude will use your Gram-hosted MCP server to create a task by calling the Taskmaster API.
Connecting Claude Desktop to your Gram-hosted MCP server using Claude Connectors
Section titled “Connecting Claude Desktop to your Gram-hosted MCP server using Claude Connectors”Claude Connectors allow you to connect Claude Desktop to your Gram-hosted MCP server without manually editing the configuration file. This is more user-friendly, but comes with one important limitation: Your MCP server must be public and must not require environment variables.
If you need to use an authenticated server or an environment variable, you need to use the MCP configuration file method described above.
Here’s how to set up a connection using Claude Connectors:
1. Access Claude Desktop settings
Section titled “1. Access Claude Desktop settings”In Claude Desktop, open settings:
- macOS: Go to Claude -> Settings… from the menu bar.
- Windows: Access settings through the application menu.
2. Open the Connectors tab
Section titled “2. Open the Connectors tab”Select Connectors from the left sidebar. This is where you can manage your connections to external services.
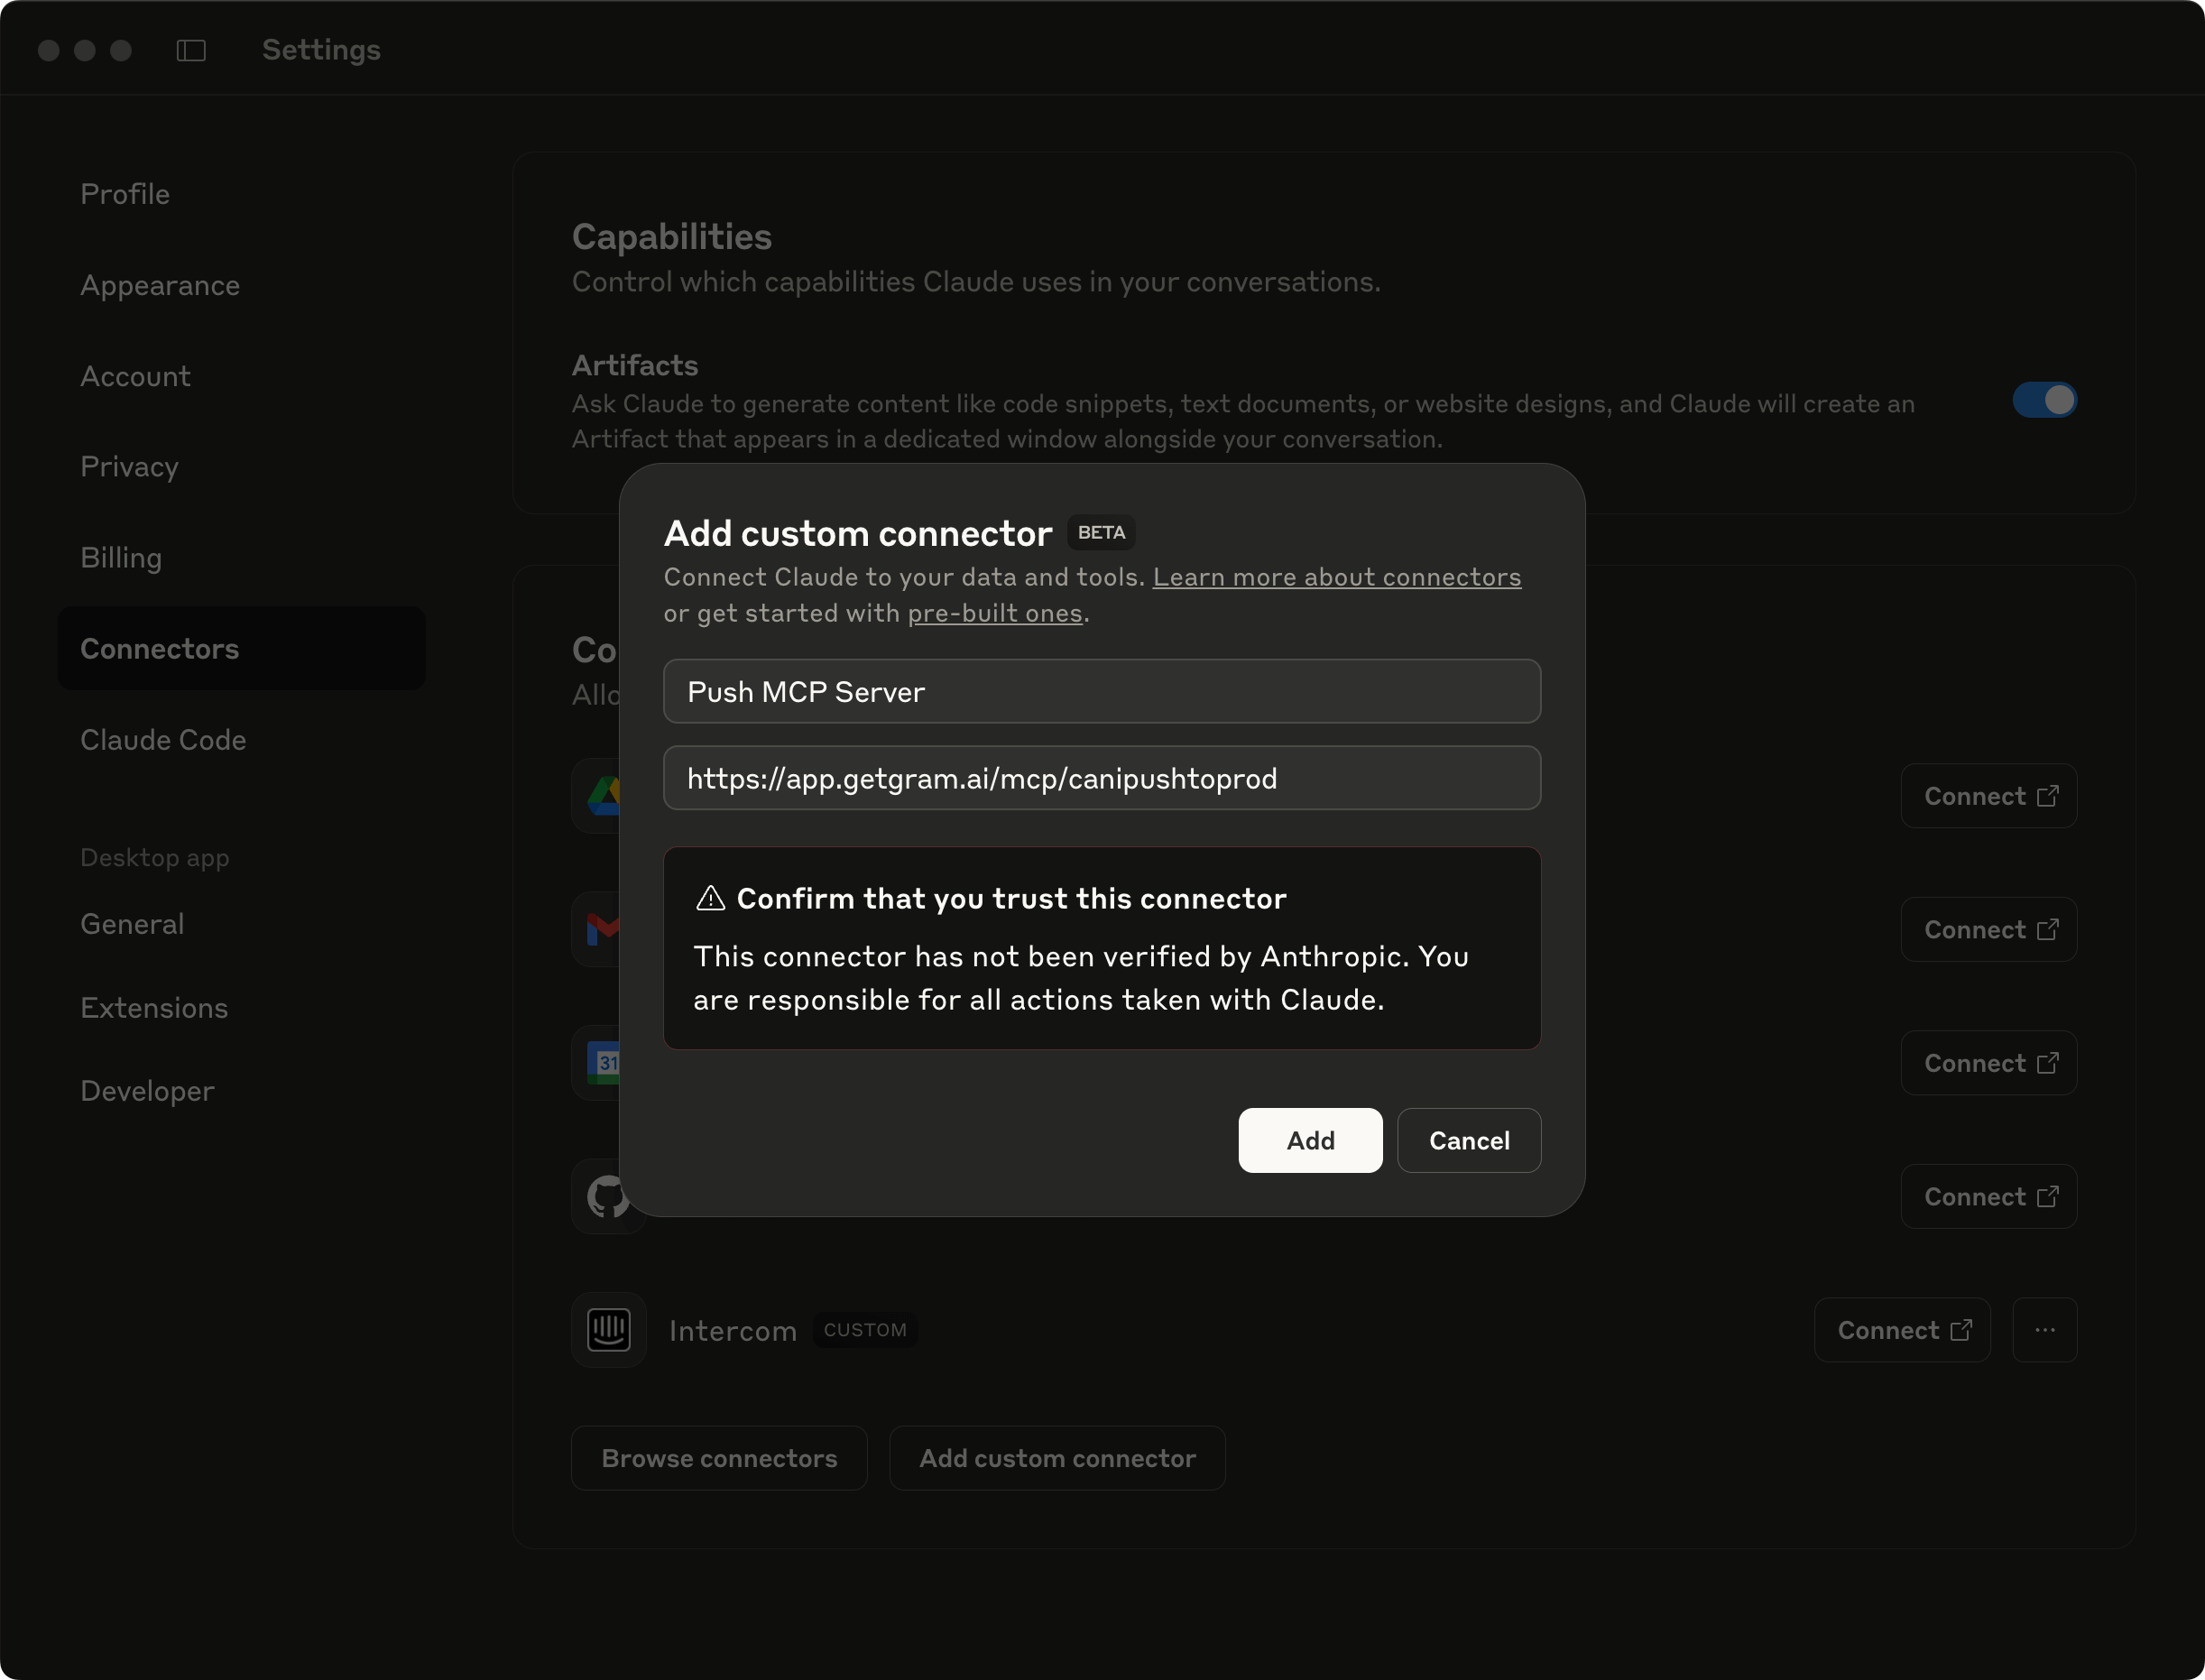
3. Add a custom connector
Section titled “3. Add a custom connector”Click the Add custom connector button.
In the popup, provide the following information:
- Name: A descriptive name for your connector (for example,
Taskmaster MCP Server). - URL: The URL of your Gram-hosted MCP server (for example,
https://app.getgram.ai/mcp/your-slug).
Claude Desktop may show a warning about trusting the server. Since this is your own MCP server, you can safely ignore this warning.
Click Add to create the connector.
4. Test the connection
Section titled “4. Test the connection”There’s no need to restart; you can test the connection immediately. In the chat, ask Claude something that requires the MCP server.
Claude should prompt you with a tool call request. This means the connection is working, and Claude can now use your Gram-hosted MCP server.
Deciding which method to use
Section titled “Deciding which method to use”Both methods connect Claude Desktop to your Gram-hosted MCP server, but they have different use cases:
- MCP configuration file: Use this method if you need to connect to an authenticated MCP server or if you want more control over the configuration.
- Claude Connectors: Use this method for a simpler setup with public MCP servers. It’s more user-friendly and doesn’t require manual configuration file editing.
Comparison of connection methods
Section titled “Comparison of connection methods”| Attribute/Requirement | MCP Configuration File | Claude Desktop Connectors |
|---|---|---|
| Public MCP server | ✅ | ✅ |
| Local MCP server | ✅ | ❌ |
| Supports authenticated server | ✅ | ❌ |
| Manual configuration needed | ✅ | ❌ |
| User-friendly setup | ❌ | ✅ |
| Supports passthrough variables | ✅ | ❌ |
Troubleshooting
Section titled “Troubleshooting”If you’re experiencing issues:
- Verify the MCP server URL is correct in your configuration.
- Check that the API behind the MCP server is reachable from your machine.
- Ensure the
npxcommand is available (reinstall Node.js if needed). - Try restarting Claude Desktop after making configuration changes.
- For authenticated servers, verify your Gram API key in the dashboard under Settings > API Keys.
What’s next
Section titled “What’s next”Ready to build your own MCP server? Try Gram today and see how easy it is to turn any API into agent-ready tools that work across all your development environments.