Using Roo Code with Gram-hosted MCP servers
Roo Code is a VS Code extension that embeds autonomous coding agents directly in your editor. Once installed, the extension has full read-write access to your open workspace, letting you chat with the agent, generate code, run tests, and refactor files within your editor.
When paired with Model Context Protocol (MCP) servers, you can connect Roo Code to your APIs, databases, and infrastructure services, granting it contextual access to your tools and data.
This guide shows you how to connect Roo Code to a Gram-hosted MCP server using Taskmaster, a full-stack CRUD application for task and project management. Taskmaster includes a web UI for managing projects and tasks, a built-in HTTP API, OAuth 2.0 authentication, and a Neon PostgreSQL database for storing data. Try the demo app to see it in action.
You’ll learn how to set up the connection, test it, and use natural language to manage tasks, projects, and workflows through Roo Code.
Find the full code and OpenAPI document in the Taskmaster repository.
Prerequisites
Section titled “Prerequisites”To follow this tutorial, you need:
- A Gram account
- A VS Code editor or any other VS Code fork such as Cursor or VSCodium
- The Roo Code VS Code extension installed
- An API key from an LLM provider supported by Roo Code (such as Anthropic or OpenAI)
Creating an MCP server
Section titled “Creating an MCP server”Before connecting Roo Code to a Taskmaster MCP server, you first need to create one. Follow our guide to creating a Taskmaster MCP server.
Connecting Roo Code to your Gram-hosted MCP server
Section titled “Connecting Roo Code to your Gram-hosted MCP server”Now let’s connect Roo Code to your Taskmaster MCP server.
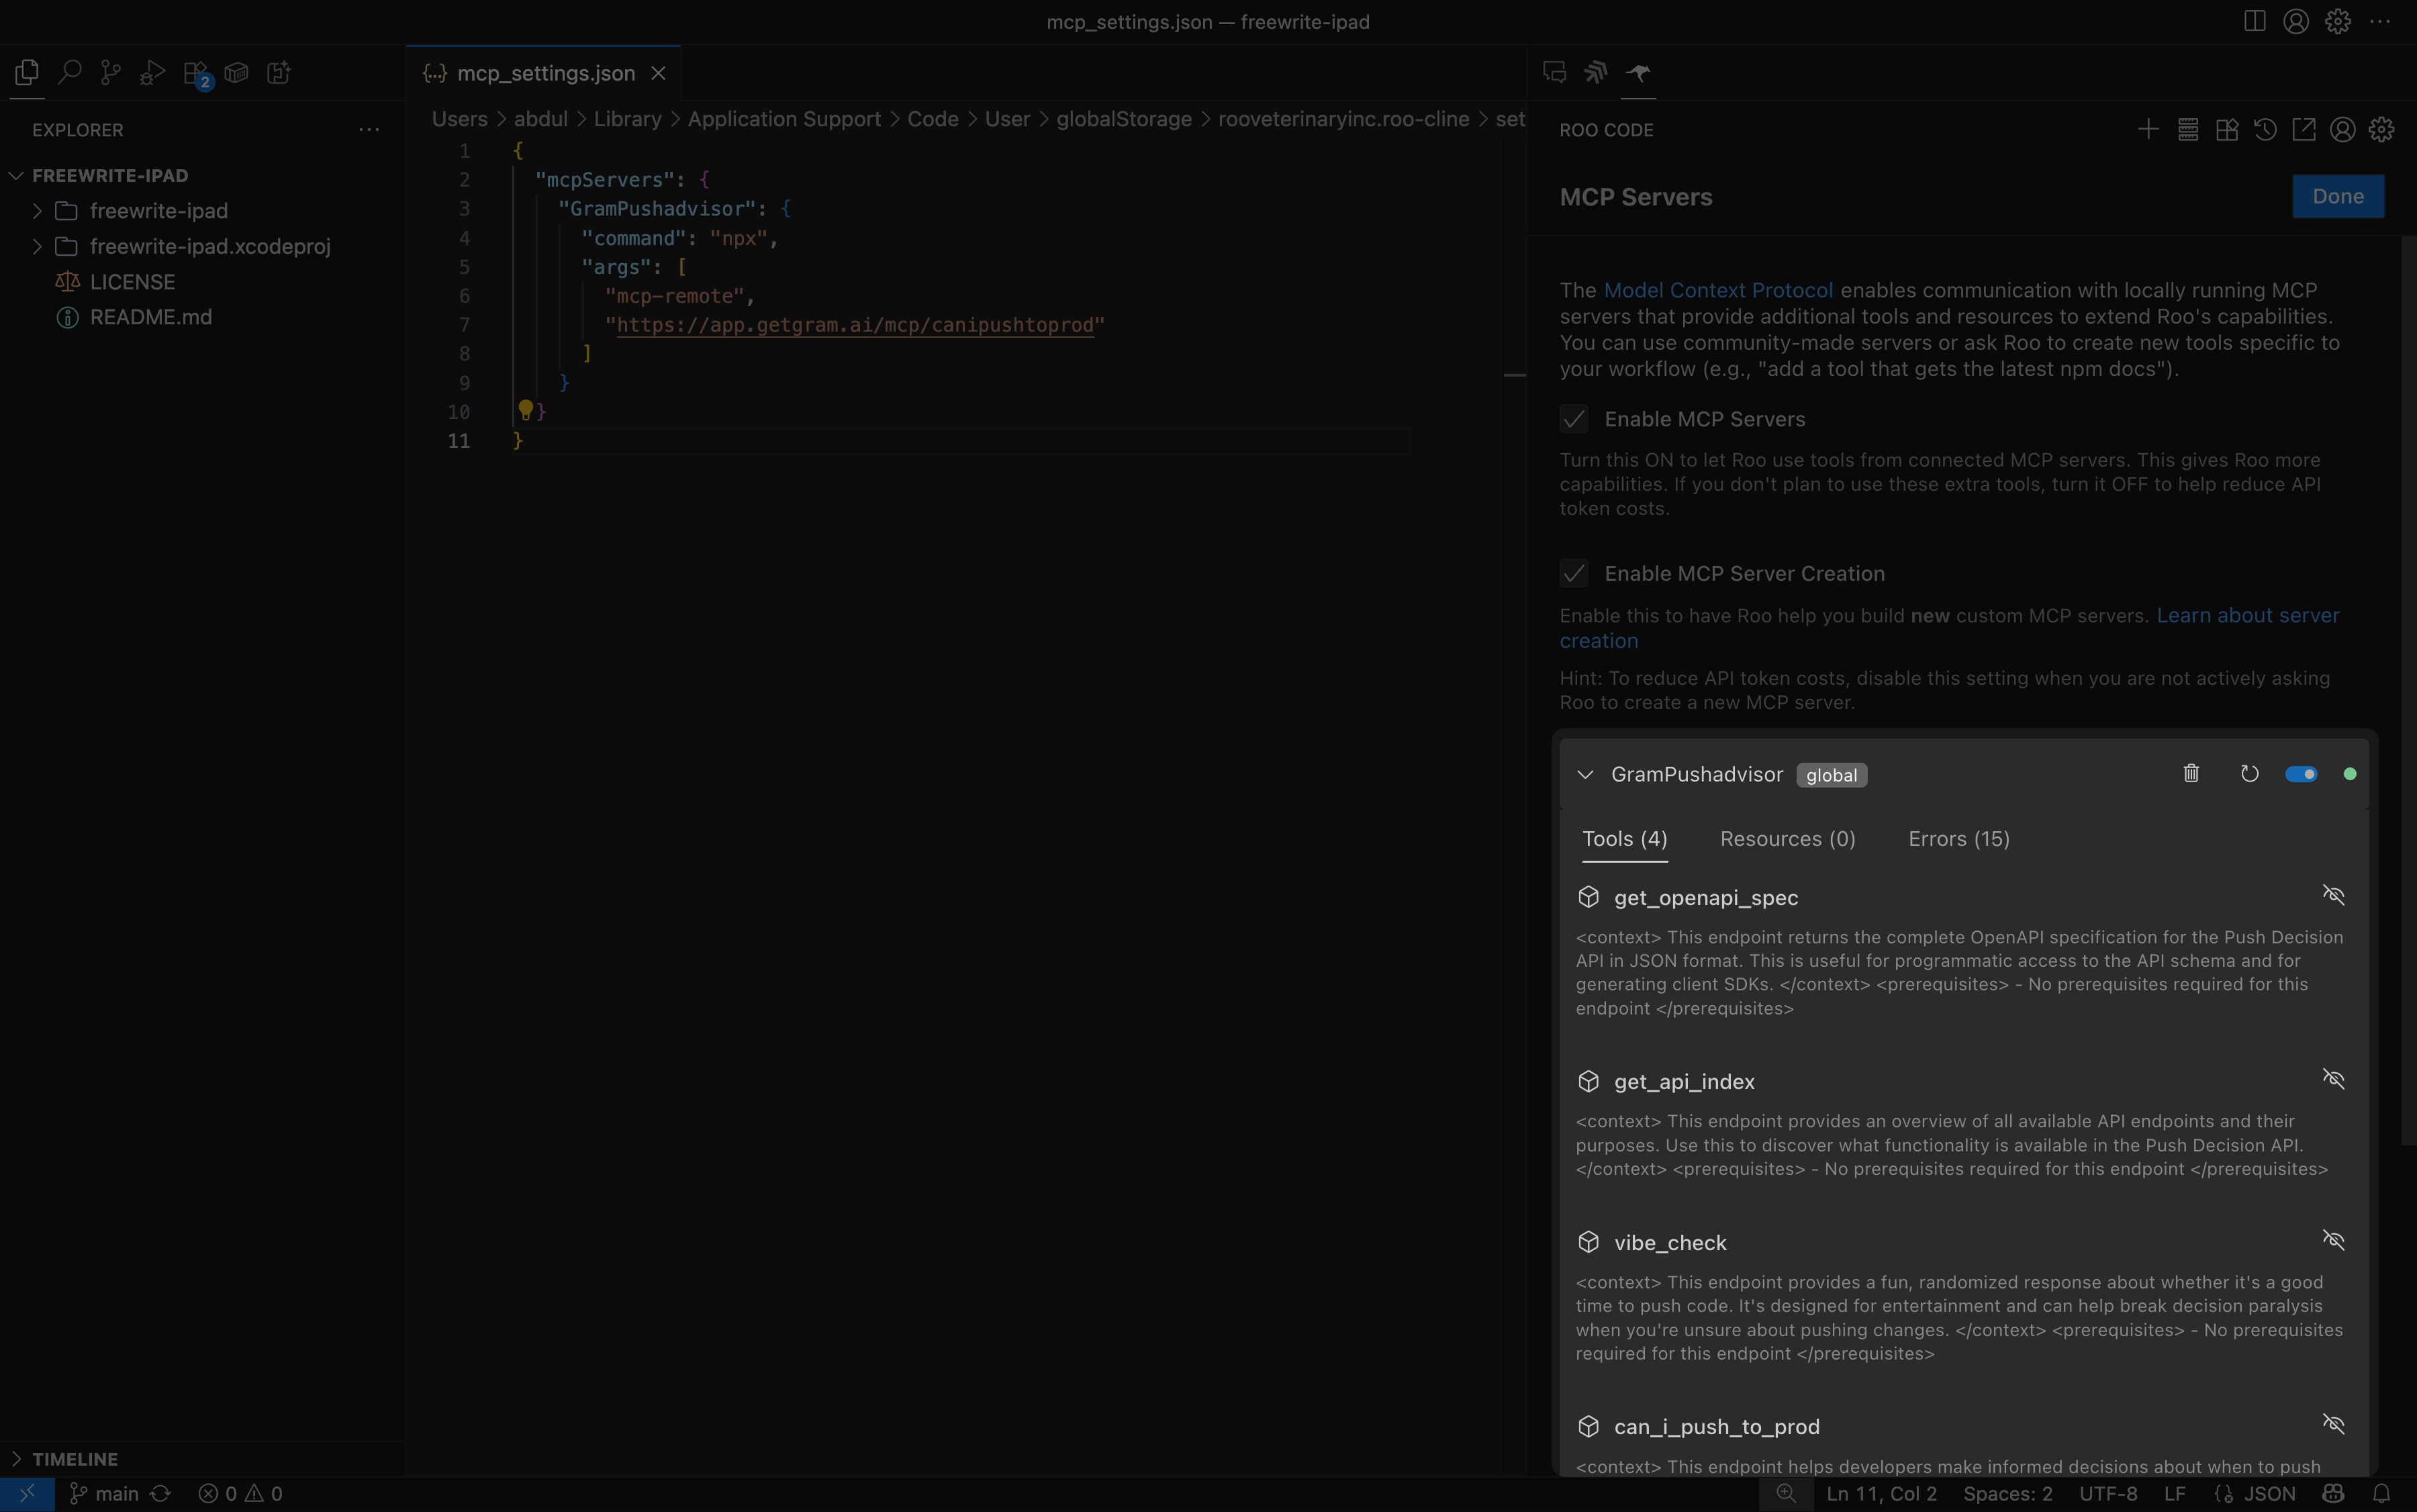
Roo Code uses an mcp_settings.json configuration file to manage MCP servers.
To add a server to Roo Code, click the Server icon at the top right of the Roo Code window.
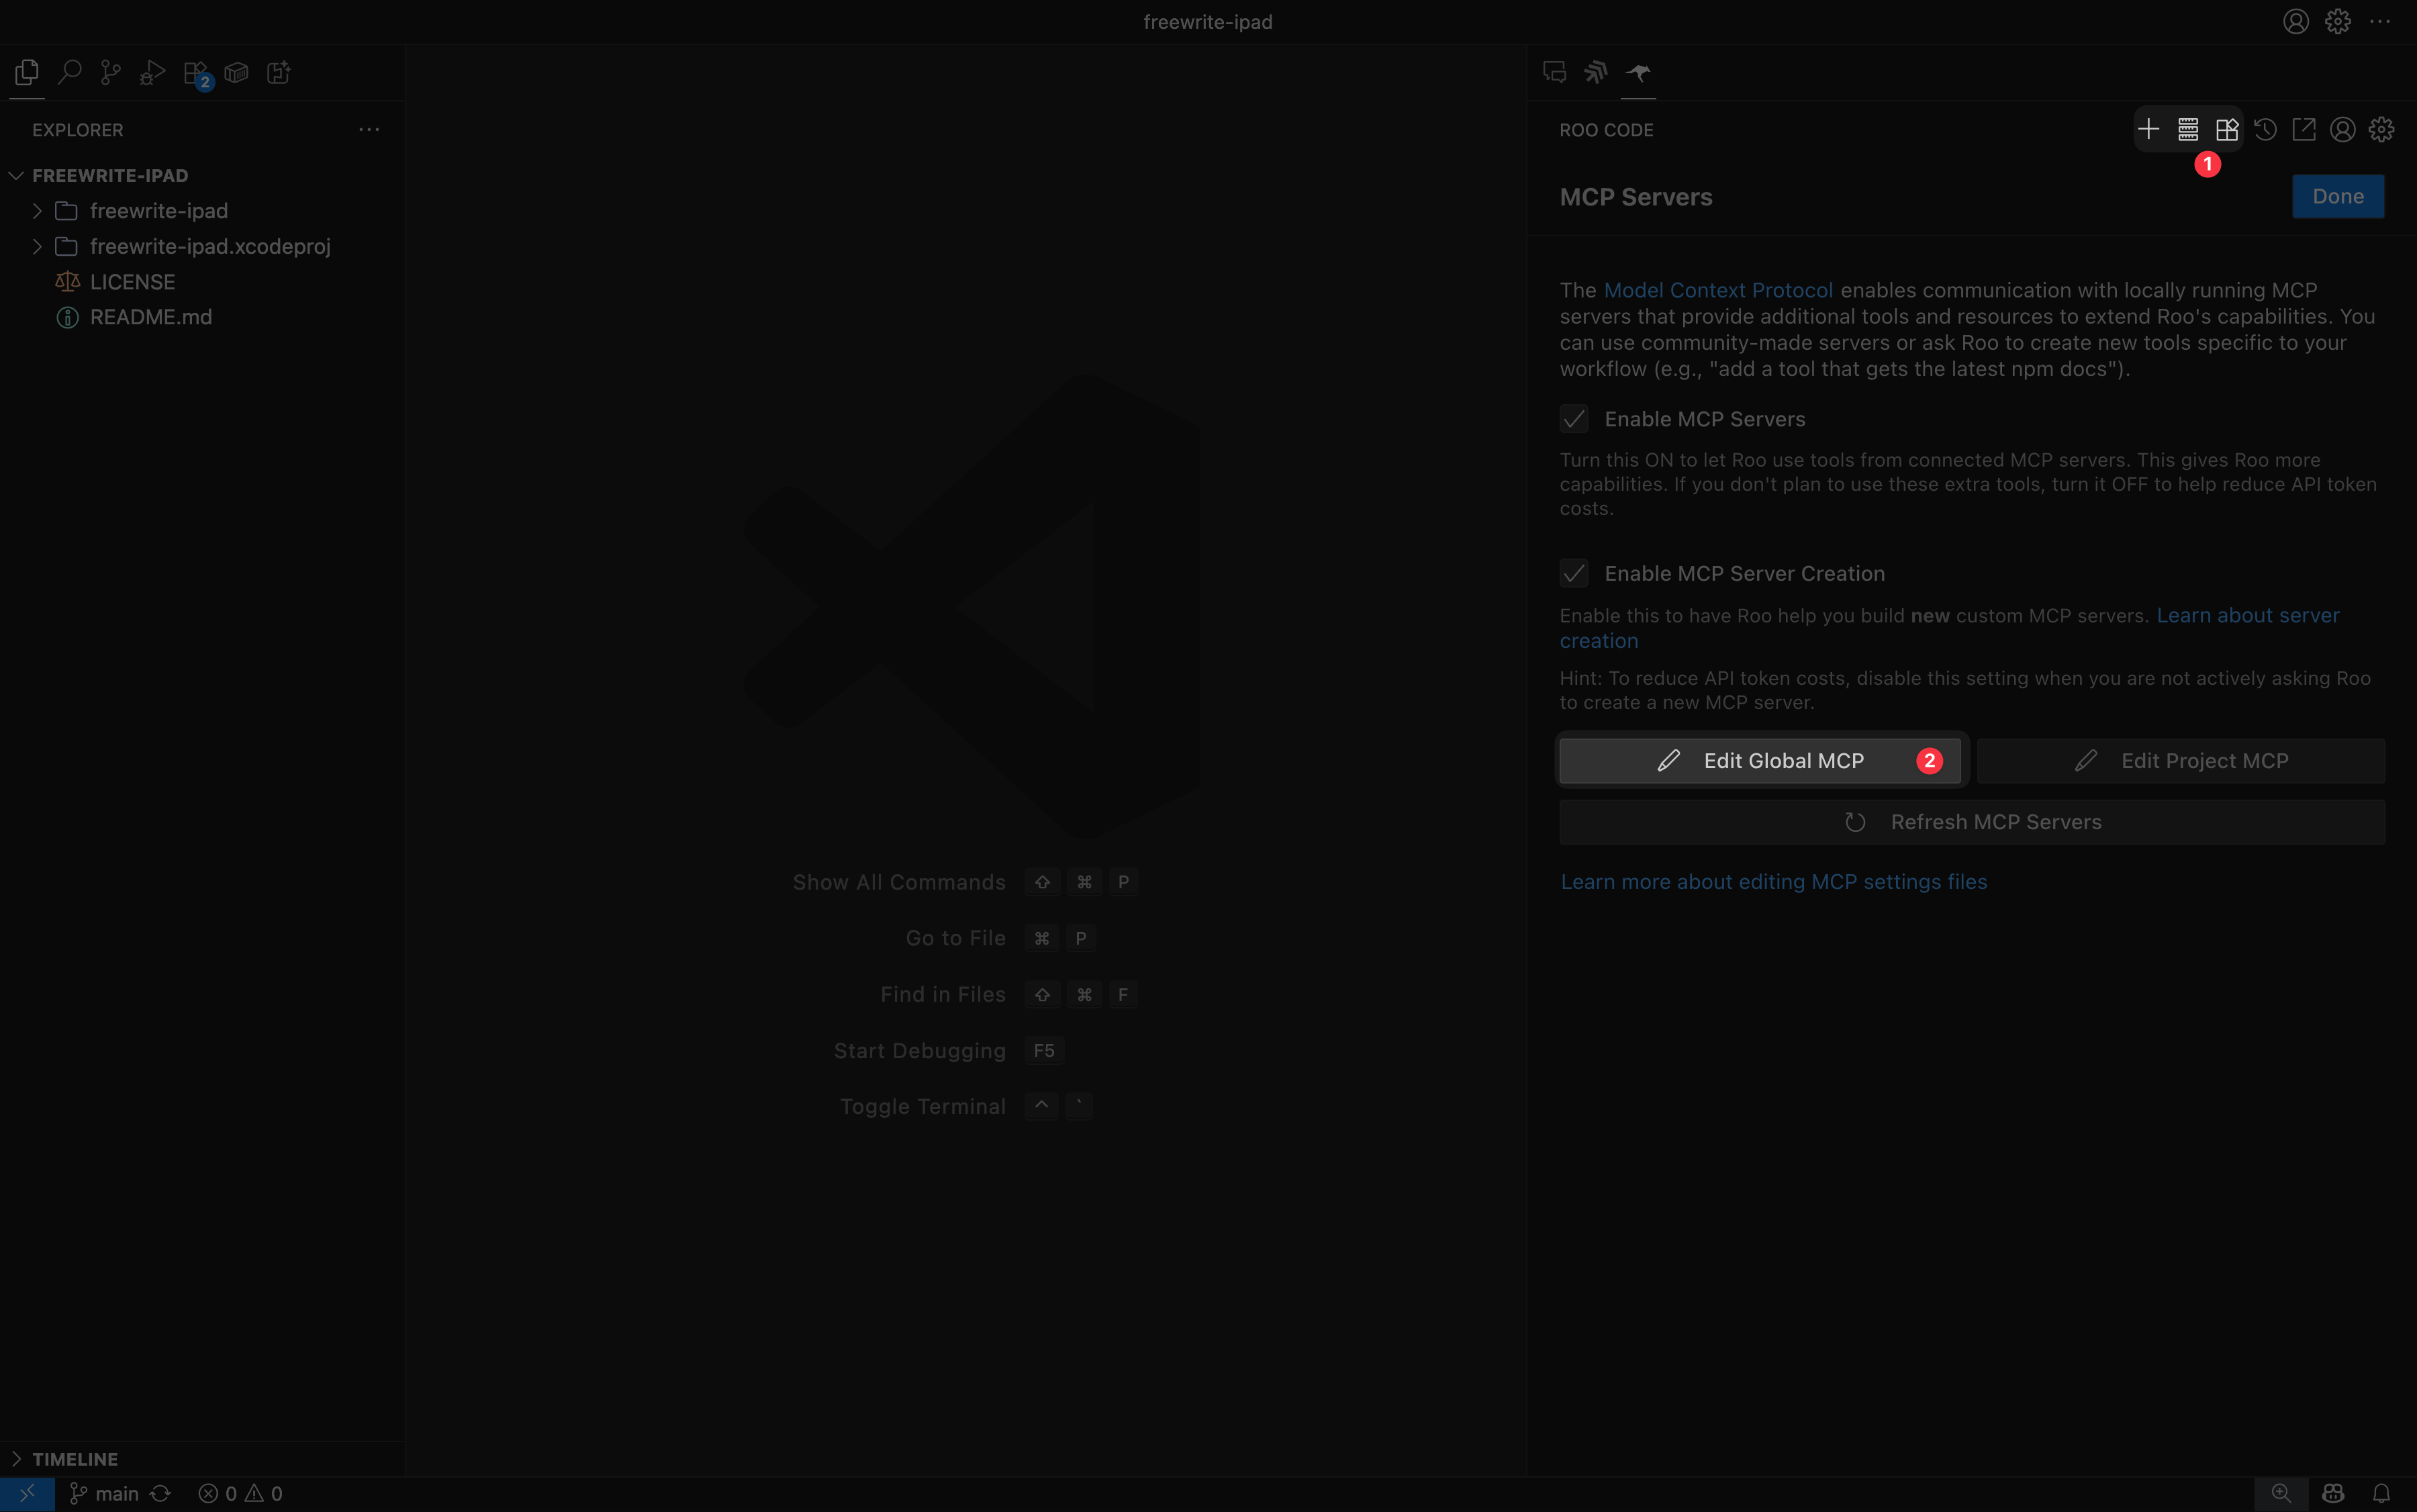
Click Edit Global MCP to open Roo Code’s global MCP server mcp_settings.json file.
Add your Taskmaster MCP server configuration from the Creating a Taskmaster MCP server guide.
-
If you’re using a Pass-through Authentication, add the following to the
mcp_settings.jsonfile:{"mcpServers": {"GramTaskmaster": {"command": "npx","args": ["mcp-remote","https://app.getgram.ai/mcp/your-taskmaster-slug","--header","MCP-TASKMASTER-API-KEY:<your-key-here>"]}}} -
If you’re using a Managed Authentication server, add the following to the
mcp_settings.jsonfile:{"mcpServers": {"GramTaskmaster": {"command": "npx","args": ["mcp-remote","https://app.getgram.ai/mcp/your-taskmaster-slug","--header","Authorization: ${GRAM_KEY}"],"env": {"GRAM_KEY": "Bearer <your-gram-api-key>"}}}}
Replace your-taskmaster-slug with the actual slug from your Taskmaster MCP server configuration and <your-gram-api-key> with your Gram API key.
Save the file, and your MCP server should show up in the Roo Code MCP server list.
Testing the connection
Section titled “Testing the connection”Now test the connection by creating a task.
Ask Roo Code a basic question like, “Can you create a new task called ‘Test MCP connection’?”
Roo Code will use the createTask tool to create a new task. Before making the API call, it will ask for your permission to use the tool:
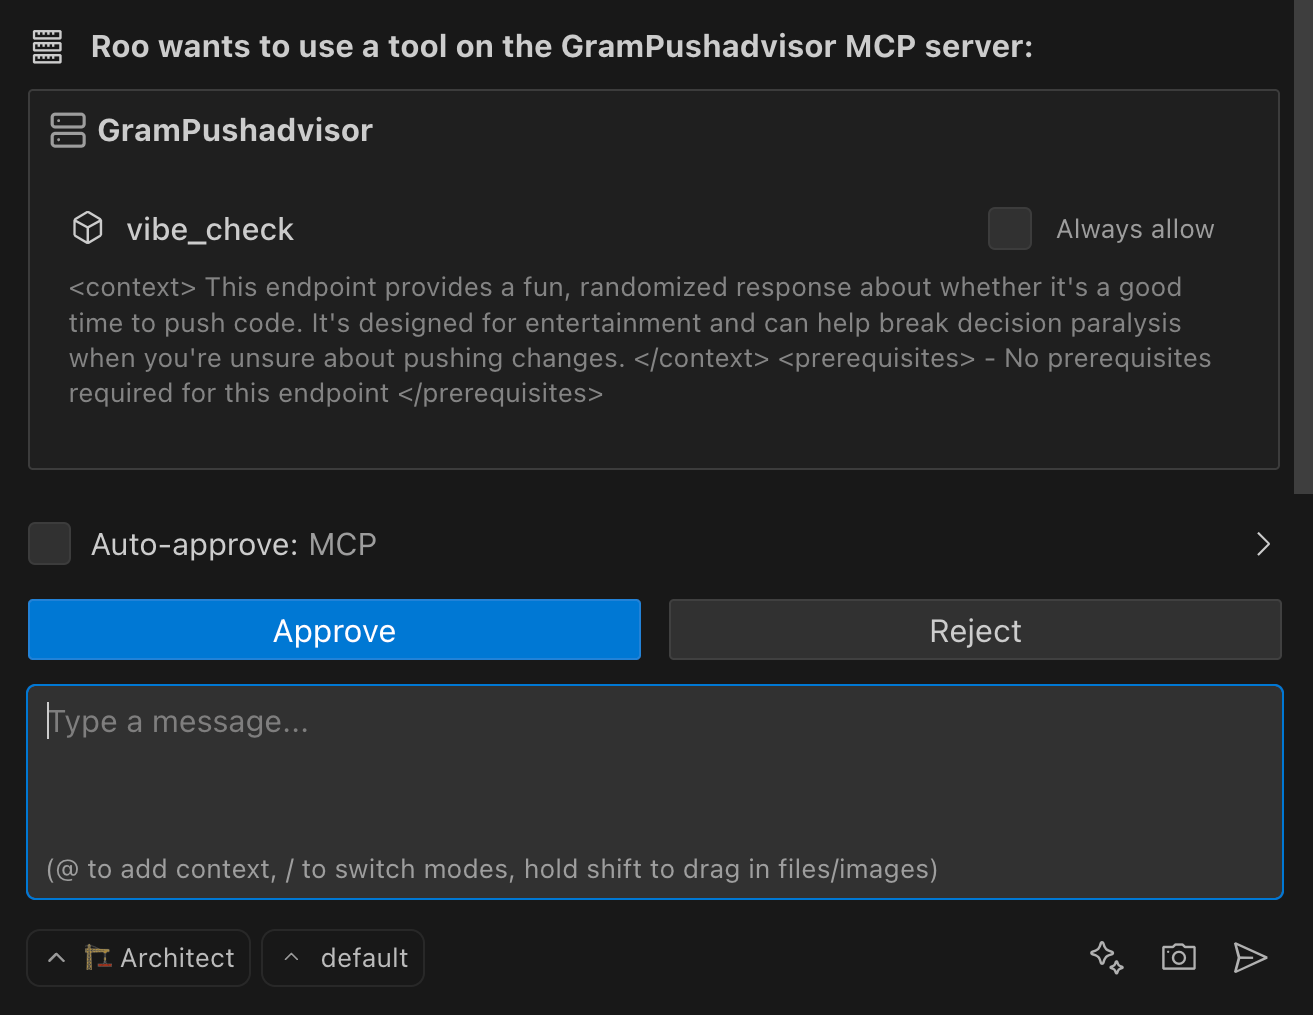
You can approve the tool call once or select Auto-approve to always allow this tool and skip future confirmation prompts. Once approved, Roo Code will make the API call and respond with the task creation results.
Troubleshooting
Section titled “Troubleshooting”Let’s go through some common issues and how to fix them.
Server not found
Section titled “Server not found”If Roo Code can’t find your server:
- Check that the
mcp_settings.jsonfile is correct and matches the configuration from Gram. - Verify that the MCP server is listed in Roo Code’s server configuration panel.
- Ensure the
npxcommand is available (reinstall Node.js if needed). - Try restarting Roo Code after making configuration changes.
Connection issues
Section titled “Connection issues”If you’re having trouble connecting to the MCP server:
- Verify the MCP server URL is correct in your configuration.
- Check that the API behind the MCP server is reachable from your machine.
- Try restarting Roo Code after making configuration changes.
Authentication errors
Section titled “Authentication errors”If you’re using an authenticated server and getting authentication errors:
- Verify your Gram API key in the dashboard under Settings -> API Keys.
- Ensure the API key is correctly formatted with the
Bearerprefix. - Check that the
GRAM_KEYenvironment variable is properly set in your configuration.
Tools not appearing
Section titled “Tools not appearing”If the tools aren’t showing up in Roo Code:
- Test the MCP server in the Gram Playground first to ensure it’s working.
- Check that the toolset includes the tools you expect to use.
- Verify the environment is correctly configured with the required variables.
- Look for any error messages in Roo Code’s output panel or logs.
What’s next
Section titled “What’s next”Ready to build your own MCP server? Try Gram today and see how easy it is to turn any API into agent-ready tools that work across all your development environments.